Learn how to download JDK 11 and install it on a Windows 11 64-bit Operating System. Java is a popular Object-oriented programming language. First of all, to start the development of Java programming, your system should have the JDK installed. This is the first step to start developing the Java application.
The Java Development Kit (JDK) is a distribution of Java Technology by Oracle Corporation. It implements the Java Language Specification and the Java Virtual Machine Specification and provides the Standard Edition of Java Application programming.
Other Downloads for Windows 10
Java 8, Java 11, Java 17, Java 19, Java 20, Java 21, Java 23
Other Downloads for Windows 11
Java 8, Java 11, Java 17, Java 19, Java 20, Java 21, Java 23, Java 24
Table of Contents
Software Dependency
- JDK 11
- Windows 11
Here we are going to download JDK 11 and install it on the 64-bit Windows 11 Operating System.
How to Download JDK 11 and Install it on Windows 11?
The installation process of the Java Development Kit (JDK) on the Windows operating system is very simple. Follow the steps below:
- Download JDK 11 for Windows 11 64-bit
- JDK Installation on Windows
- Set up System Environment Variables
- Verify the Java Installation
Step-1: Java JDK 11 download for Windows 11 64-bit
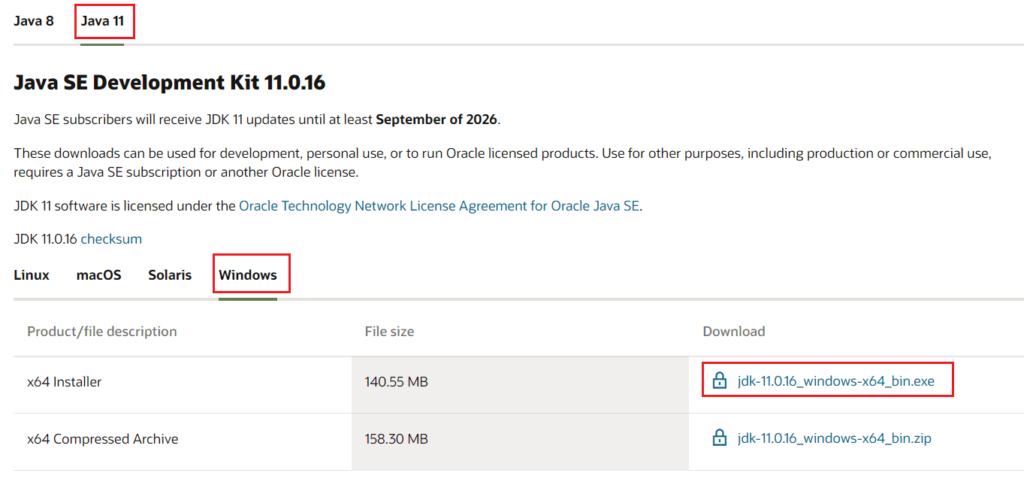
To download JDK 11 software, visit its official Oracle Website’s Java and go to Java SE Development Kit 11.0.16 and click on jdk-11.0.16_windows-x64_bin.exe as shown in the image below.
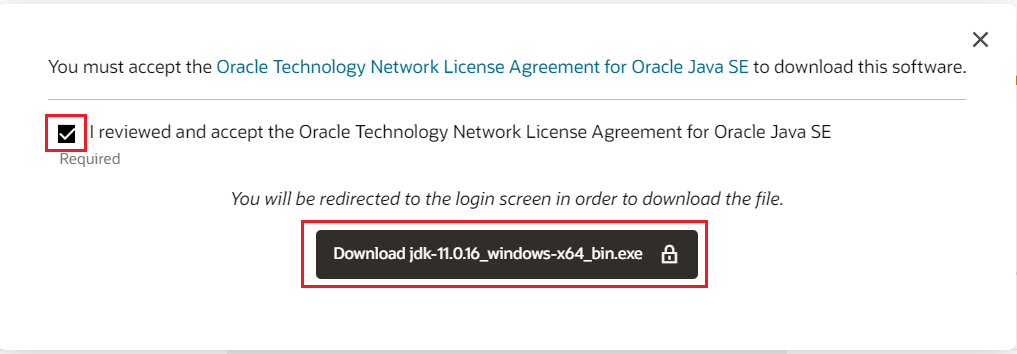
Once you click on the link (jdk-11.0.16_windows-x64_bin.exe), it will ask you to accept the License Agreement. Now you have to accept the license agreement and then click on the download button as shown in the image below.
Now, once you click on the download link, it will ask you to sign in to the Oracle Account to allow you the start downloading. If you have an account already, sign in with that; otherwise, create a new Account and then continue.
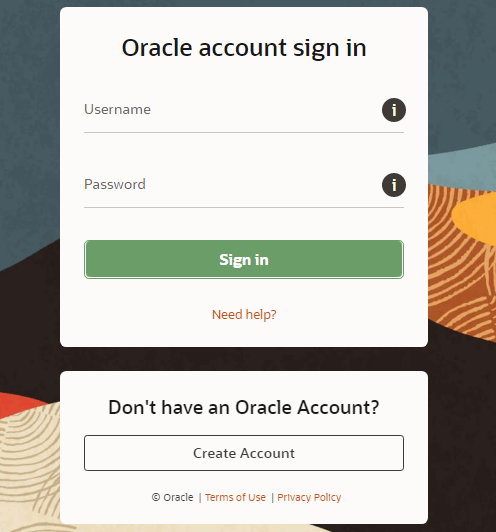
NOTE: Oracle requires an account (sign-in) to download older versions of Java that are no longer available to the public. You can download publicly available versions of Java without signing in which is the latest version only.
Step-2: Install JDK 11 on Windows 11
Once you have downloaded the JDK 11 Software (jdk-11.0.16_windows-x64_bin.exe), double-click on it to start the installation process.
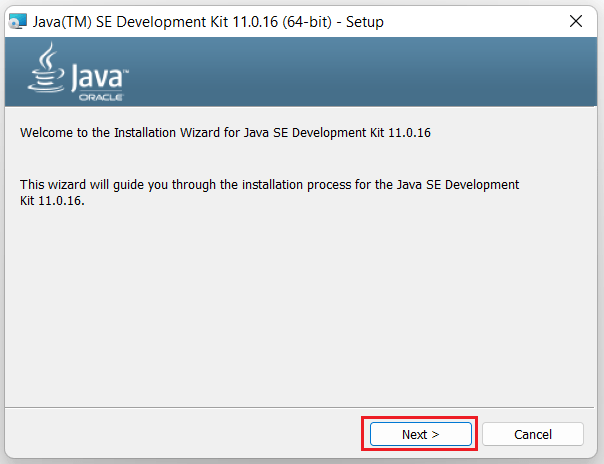
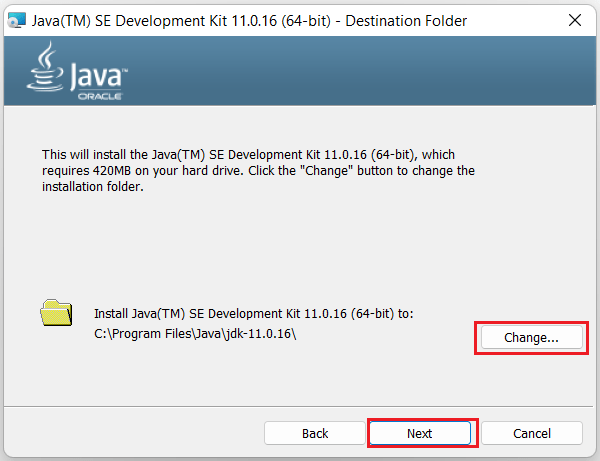
Now click Next to see the image below. Here you have a choice to change the Java installation directory by clicking on the change… button; otherwise, simply go with the default path by clicking the Next > button. I am going here with the default path only.
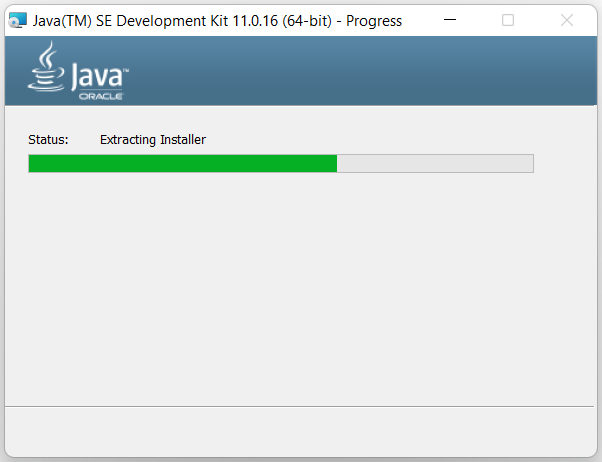
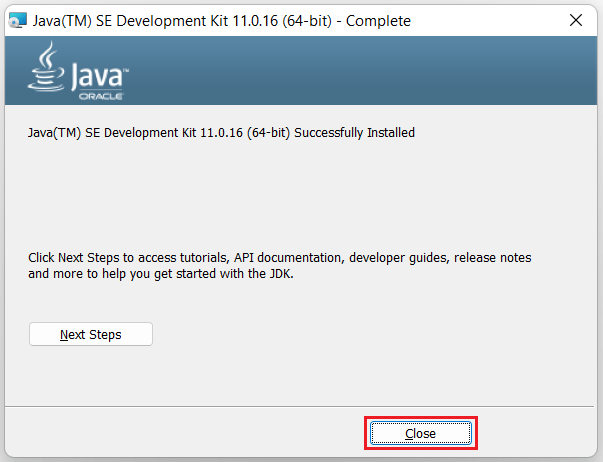
Once you click Next, you will see the start of the installation process as image below. After successful installation, you just close the installation wizard.
Step-3: Set Java path in an environment variable in Windows 11
System Environment Variables path:
Right click on This PC -> properties -> Advanced System Settings -> Environment variables
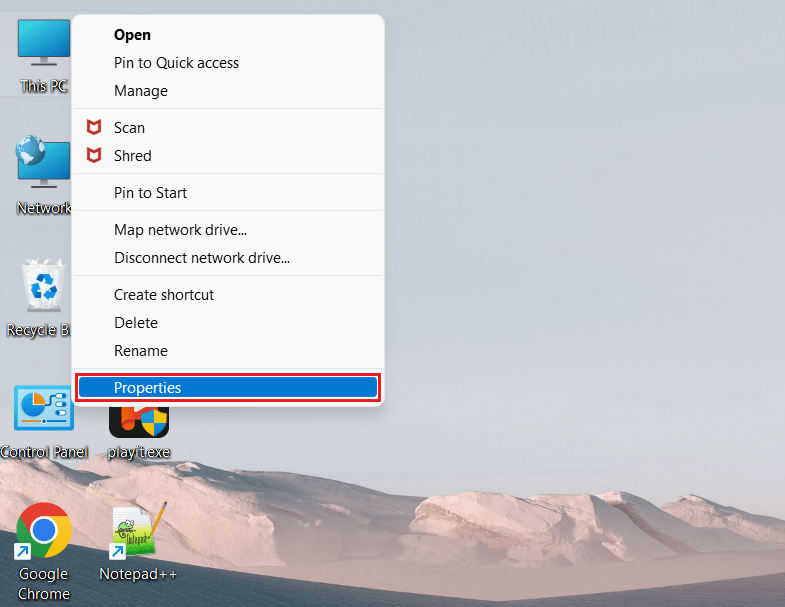
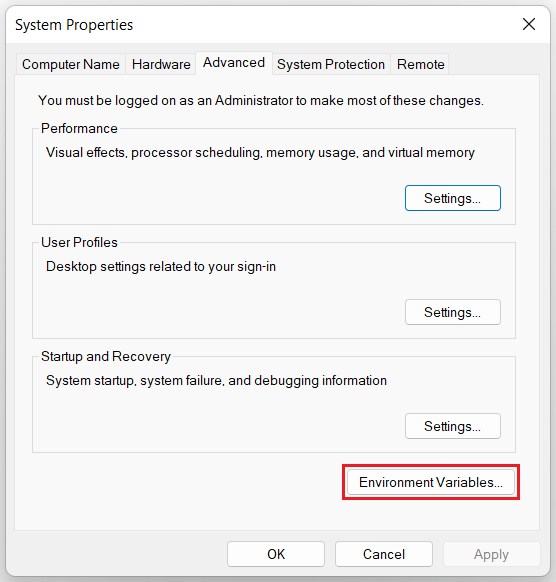
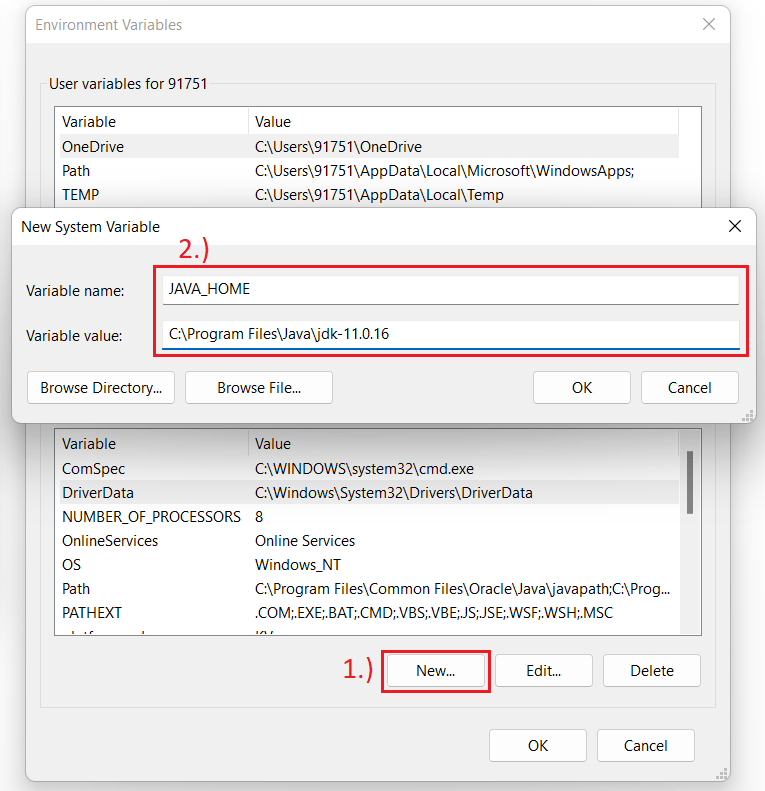
Now click on the Environment Variables button > add JAVA_HOME & Path as shown in the images below:
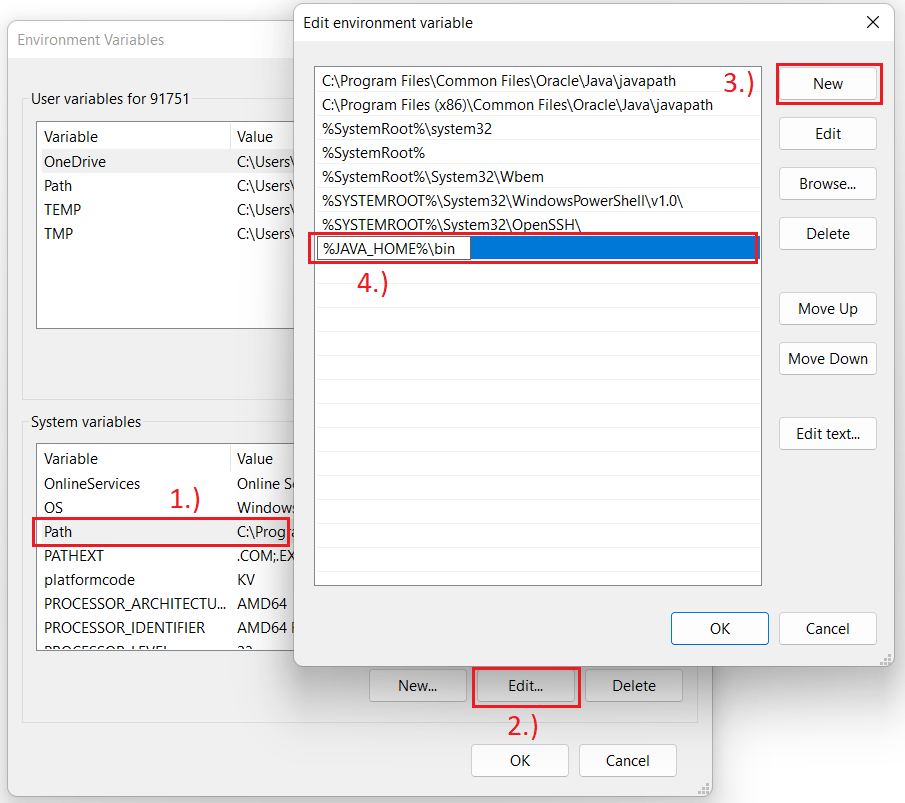
Now we have to add Java Path. If the Path variable is already there, then we can simply click on the Edit… button > then click the New button to add the path as in the image below.
Step-4: Verify the Java Installation
To verify the installation, open the command prompt(Win+R key and type cmd) and then type java -version and press Enter key.
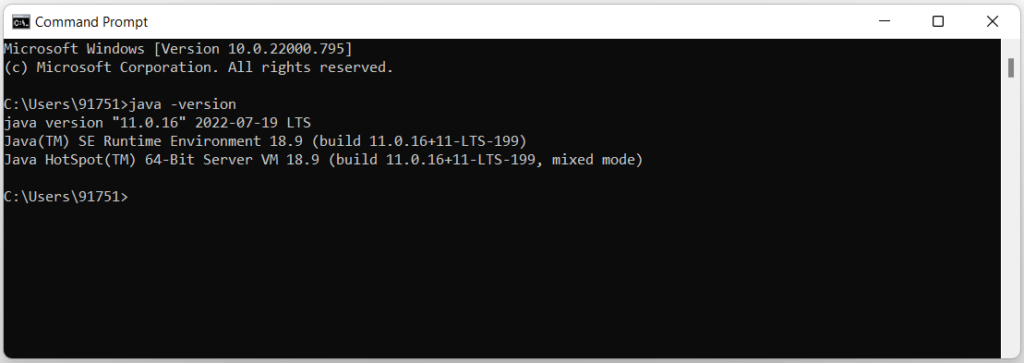
Congratulations! You have successfully installed Java SE 11 on your Windows 11 64-bit operating system. Now, create the first Java Hello World program.
Conclusion
In this tutorial, you have seen how to download and install Java SE development kit 11.0.16 (JDK-11) on the Windows 64-bit Operating system. You have also seen how you can verify the successful installation of the JDK software.
Start learning Java Logical Programs now.
FAQ
Does JDK 11 include JRE?
No, in JDK 11, JRE is no longer available. In this release, the JRE or Server JRE is no longer offered. Only the JDK is offered.
How do I check what JDK I have?
Open the command prompt (type ‘cmd’ in the Windows search box and press Enter), and then type the command ‘java -version’ and press Enter. It will show you the installed version of Java. You can refer to step 4 of the JDK installation steps in this article.
Related articles:
- JDK 1.8 download and install on Windows 11
- JDK 17 Installation on Windows 10 [step-by-step]
- JDK 8 Installation on Windows 10 [step-by-step]
- How to install Maven on Windows System
- How to install and configure Tomcat Server in Eclipse?
- Install MySQL Server 8.0.27 [zip Archive] on Windows 10
