In this article, you will see how you download MySQL and install MySQL server 8.0.27 on the Windows 10 operating system using the MSI installer. The MSI installer is also known as Microsoft Installer or Windows Installer. It is a type of installer developed by Microsoft for use in the Microsoft operating system.
How do we install MySQL Server on Windows 10 64-bit?
Steps to install MySQL Server on Windows 10:
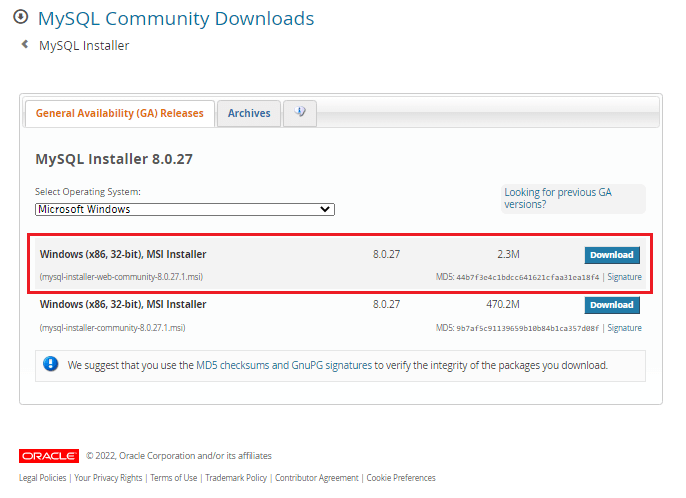
STEP-1 (MySQL download for Windows): First, we have to download the MySQL MSI Installer from its Official website download page. On the download page, select the operating system as Microsoft Windows and choose Windows (x86, 32-bit), MSI Installer, then click on the download button, as you can see in the image below.
STEP-2: Once you click on the download button, it will open the page below. Here, you just need to click on the link No thanks, just start my download to start downloading.

STEP-3: Once the MSI installer has been downloaded successfully, you can see the installer file (mysql-installer-web-community-8.0.27.1.msi) in the download section of your computer. Now open the installer by double-clicking on it, then it will start initiating the installer window as image below.

STEP-4: Before opening the installer window, It will ask for permission; when it does, click Yes.
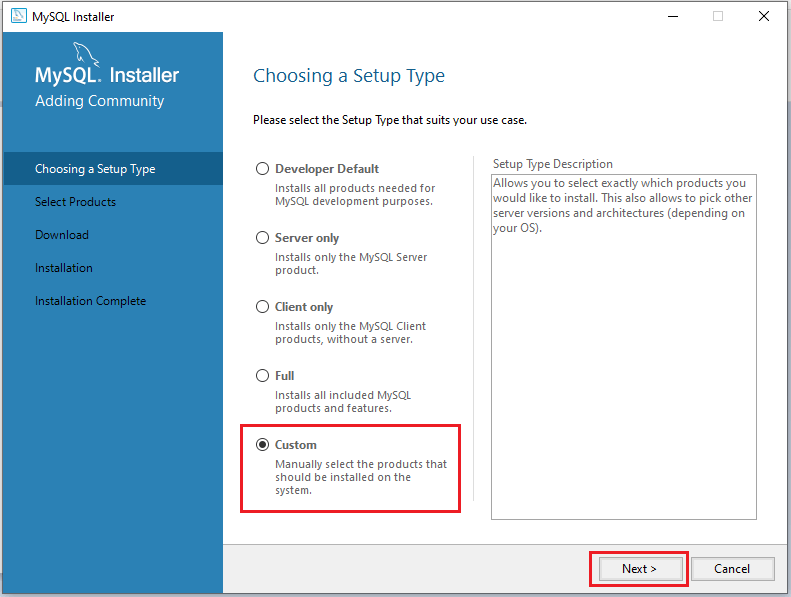
Once the MySQL Installer window opens, we have to choose the setup type. We will choose here the Custom type as shown in the image below. And click on the Next button to proceed.
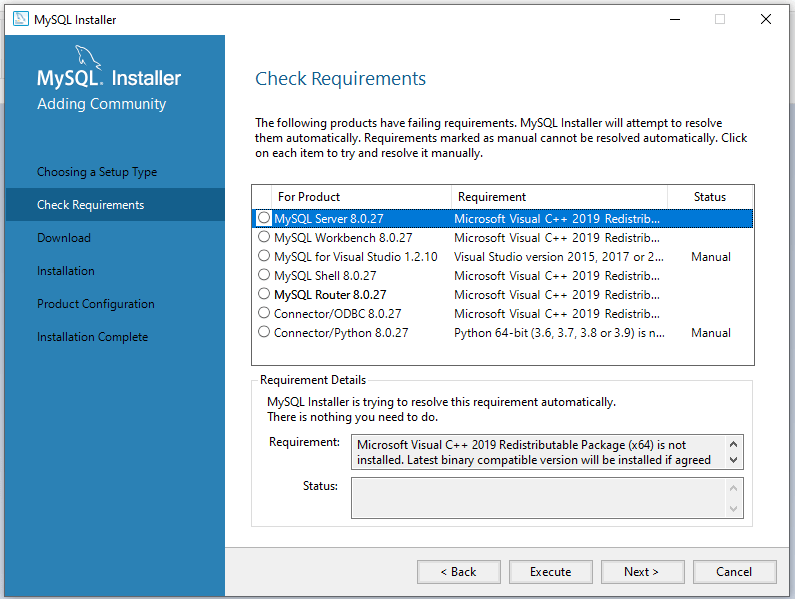
STEP-5: If your system doesn’t have prerequisite dependencies installed, then you will see the below dialog to install them. If you see the dialog, then you have to install them by clicking on the Execute button. If you don’t see such a dialog, move to the next step directly.
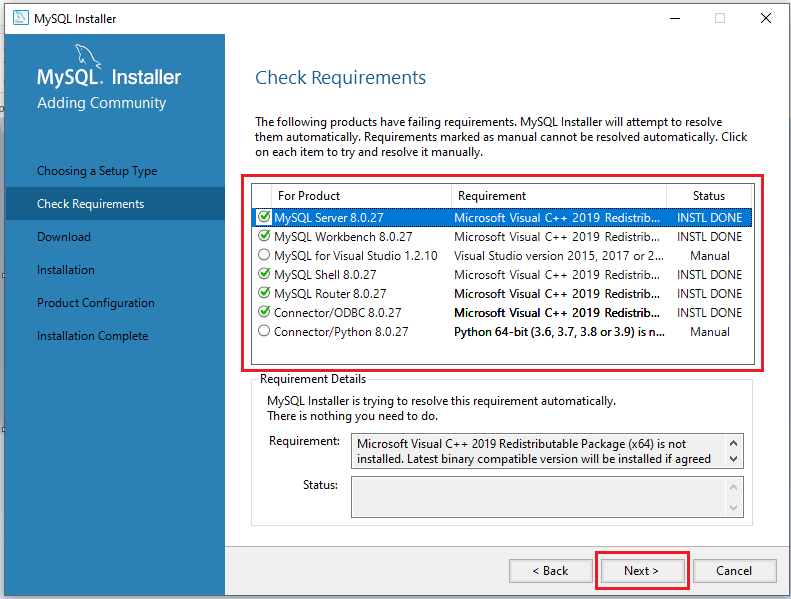
Once the required dependencies have been installed successfully, you will see the following dialog for confirmation. Now click on the Next button to proceed.
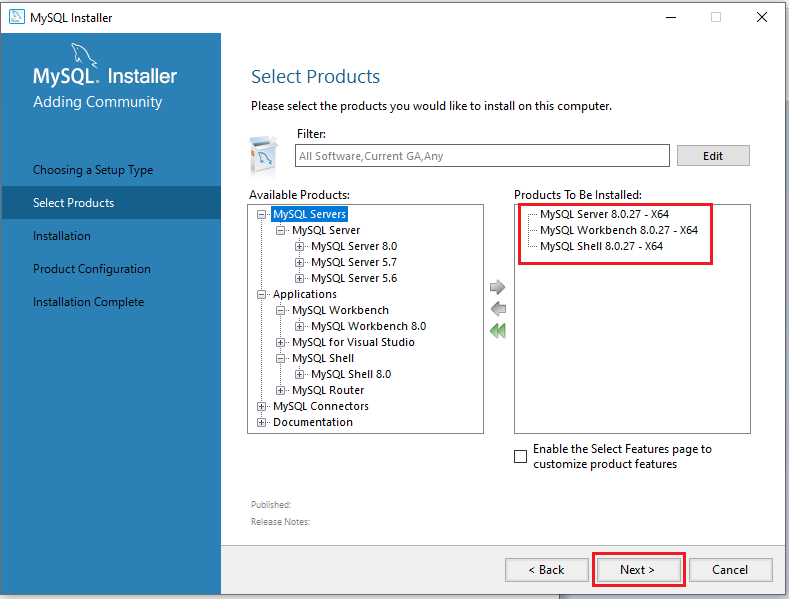
STEP-6: Now select the products that you want to install. Here we have selected MySQL Server 8.0.27, MySQL Workbench 8.0.27, and MySQL Shell 8.0.27 to install, as you can see in the image below. Now, click on the Next button.
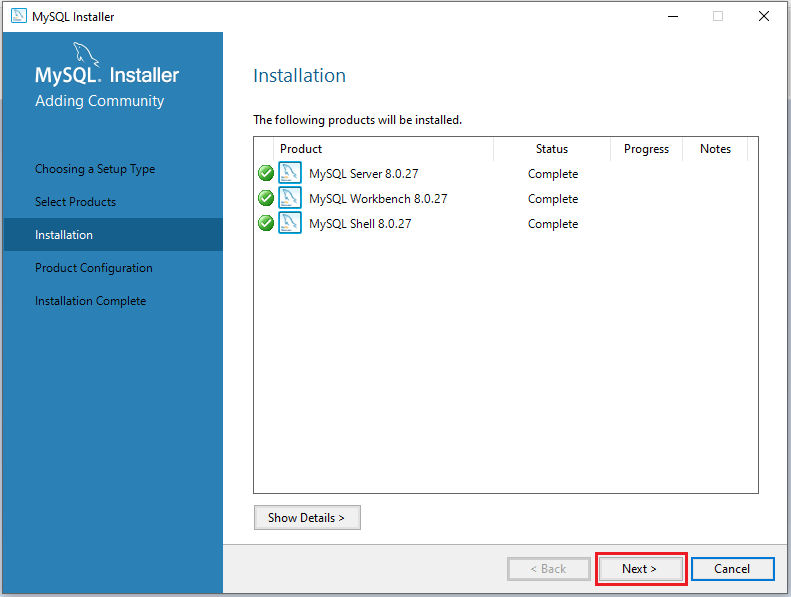
Once selected products are installed successfully, you will see the following dialog with the status complete.
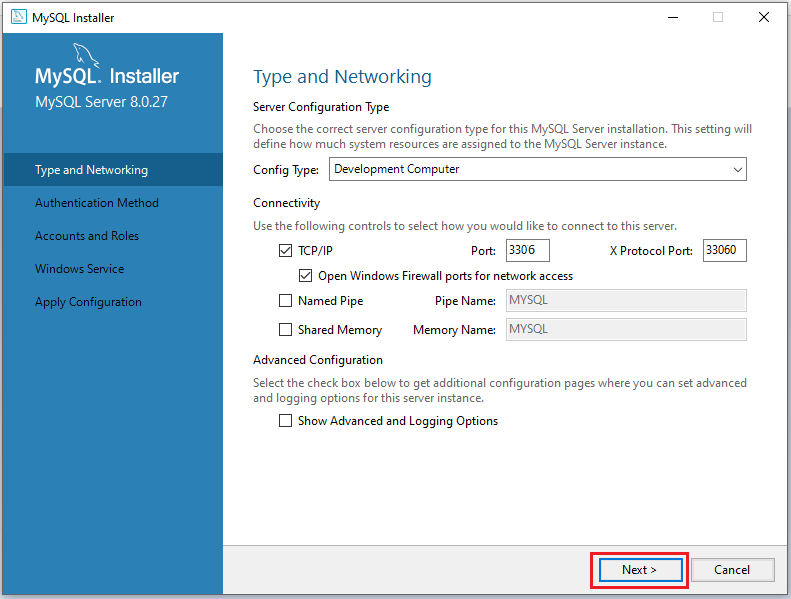
STEP-7: Now, under the Type and Networking section, you have to do server configuration. We recommend that you go with the default configuration setting and simply click on the Next button.
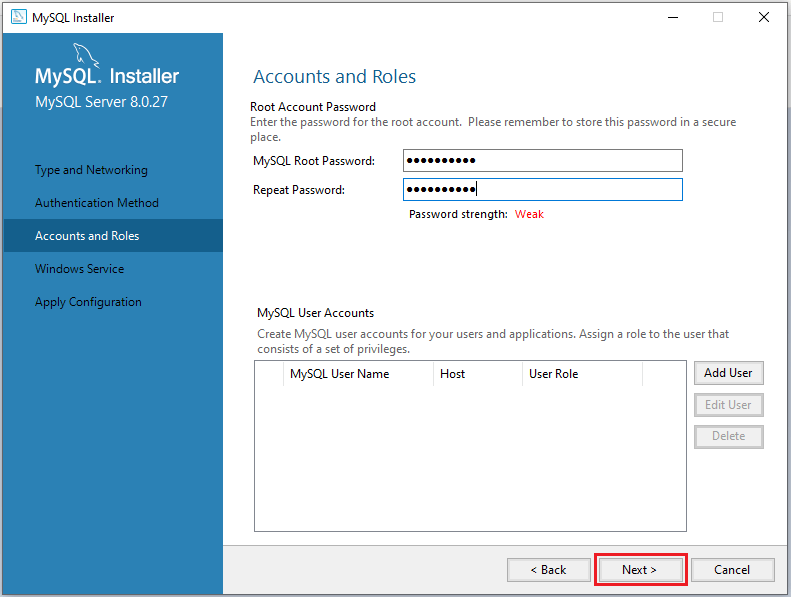
STEP-8: Now, under the Accounts and Roles section, you can set the password for the root account. And click on the Next button.
STEP-9: Now it will ask you to create and apply a configuration. Here, simply click on the Execute button to do that. It will just take a few minutes to complete.
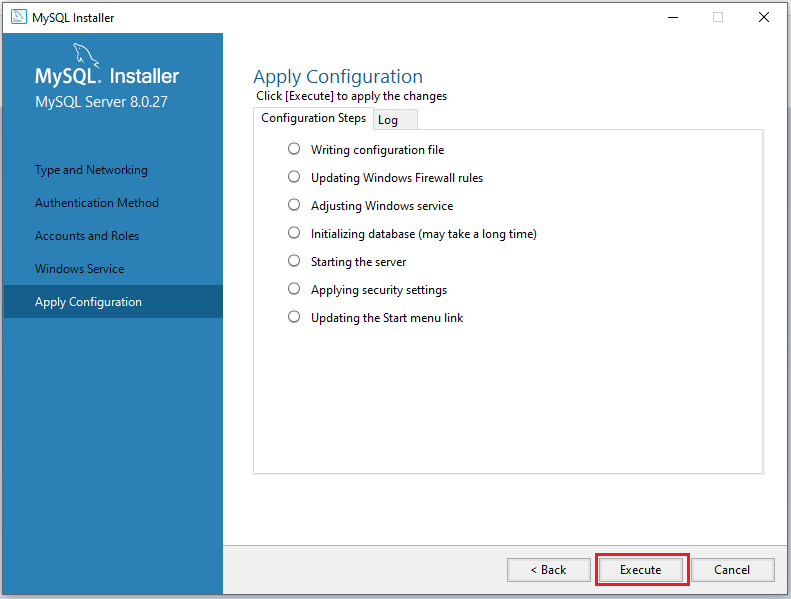
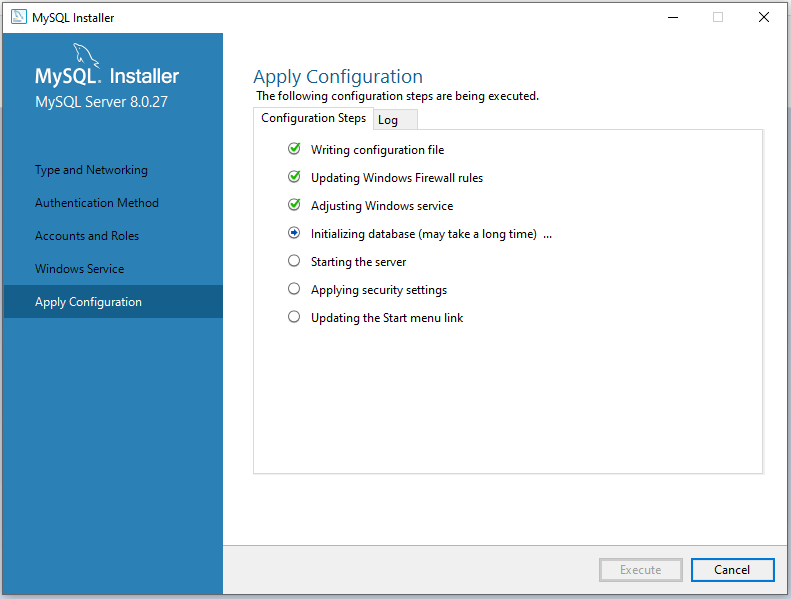
As you can see, the progress is as shown in the image below.
Once the configuration for MySQL Server 8.0.27 was successful, you will see the following dialog. Now, click on the Finish button to complete the installation process.
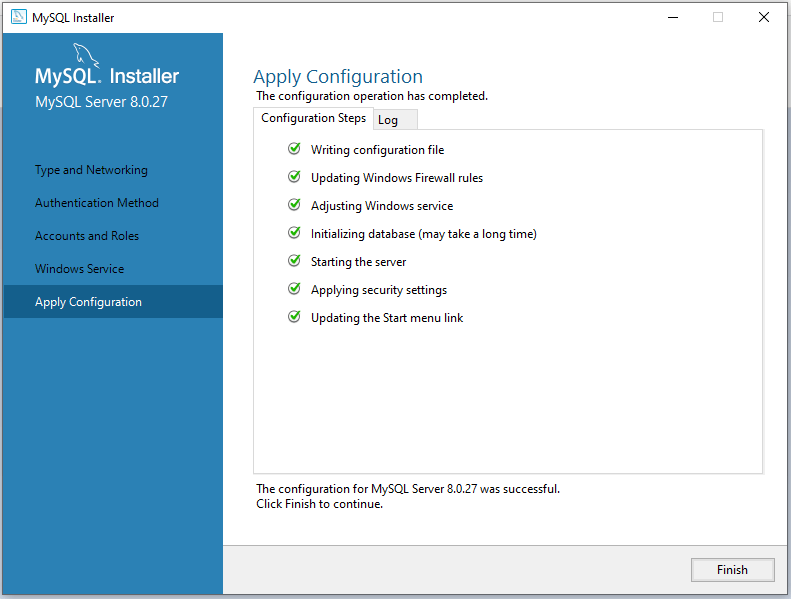
That’s it! Now you have successfully installed MySQL Server on your Windows machine.
Conclusion
In this article, you will see the step-by-step installation process of MySQL Server along with MySQL Workbench 8.0.27 using the MSI Installer. MySQL Server is a powerful and widely used relational database management system that provides excellent support for managing and storing data for various applications.
Related articles:
- Install MySQL Server 8.0.27 [zip Archive] on Windows 10
- JDK 8 Installation on Windows 10 Operating System
- How to install and configure Tomcat Server in Eclipse?
