In this article, you will learn how to download JDK 19 for Windows and install JDK 19 on Windows 10 Operating System. To start developing Java applications, your system should have JDK (Java Development Kit) installed. This is the first step to starting developing the Java application.
NOTE:
JDK is a java development kit whereas JRE is a java runtime environment that allows the java program to run. If you want to develop Java applications, install the Java Development Kit. The JDK includes the JRE, so you do not have to download both separately.
Other Downloads for Windows 10
Java 8, Java 11, Java 17, Java 19, Java 20, Java 21
Other Downloads for Windows 11
Java 8, Java 11, Java 17, Java 19, Java 20, Java 21
Table of Contents
Software Dependency to Install JDK 19
- JDK 19
- Windows 10
In this JDK installation guide, we are going to download JDK 19 for Windows and install it on the Windows 10 64-bit Operating System.
How to install JDK 19 on Windows 10?
To install JDK 19 on Windows 10 OS, follow the below steps:
- Java JDK 19 download for Windows 10 64-bit
- Install JDK on Windows
- Set Java path in system environment variables
- Verify the Installed Java version
Step-1. Download Java JDK 19 for Windows 10 64-bit
To download Java for Windows, visit the official website of Oracle Download JDK 19 for Windows 64-bit, go to ‘Java SE Development Kit 19.0.1 downloads‘, and click on the link https://download.oracle.com/java/19/latest/jdk-19_windows-x64_bin.exe as shown in the below image.
Note: JDK 19 binaries are free to use in production and free to redistribute, at no cost, under the Oracle No-Fee Terms and Conditions. The JDK 19 will receive updates under these terms, until March 2023 when it will be superseded by JDK 20.
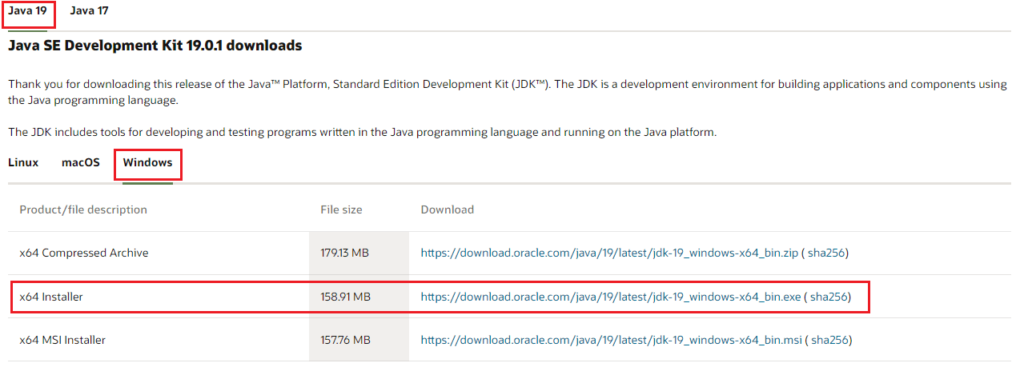
NOTE: Oracle requires an account (sign-in) to download older versions of Java that are no longer available to the public. You can download publicly available versions of Java without signing in which is the latest version only.
Step-2. Install Java JDK 19 on Windows 10
Once you have downloaded the JDK Software (jdk-19_windows-x64_bin.exe), double-click on it to see the start of installation. It will ask you permission to start, you just click the Yes button. Now you will see the below dialog, in that just click on the Next button to proceed.

Once you click on the Next button you will see the below image, Here you have a choice to change the Java installation directory by clicking on the change… button otherwise simply go with the default path (C:\Program Files\Java\jdk-19) by clicking the Next > button. I am going here with the default path only.

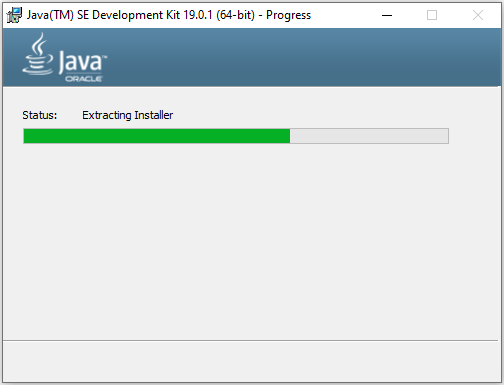
Now you can see the installation of JDK 19.0.1 (64-bit) is in progress.
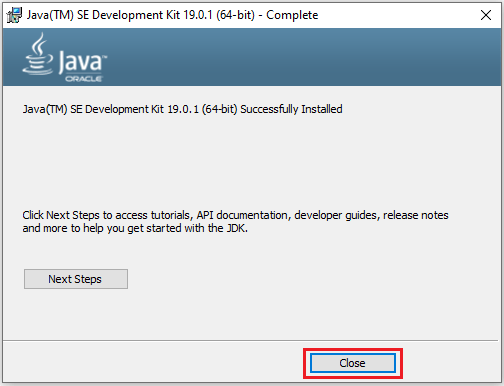
Once the installation process has been completed, you just click on the Close button to finish the installation.
Step-3. Set Java Path in System Environment Variables
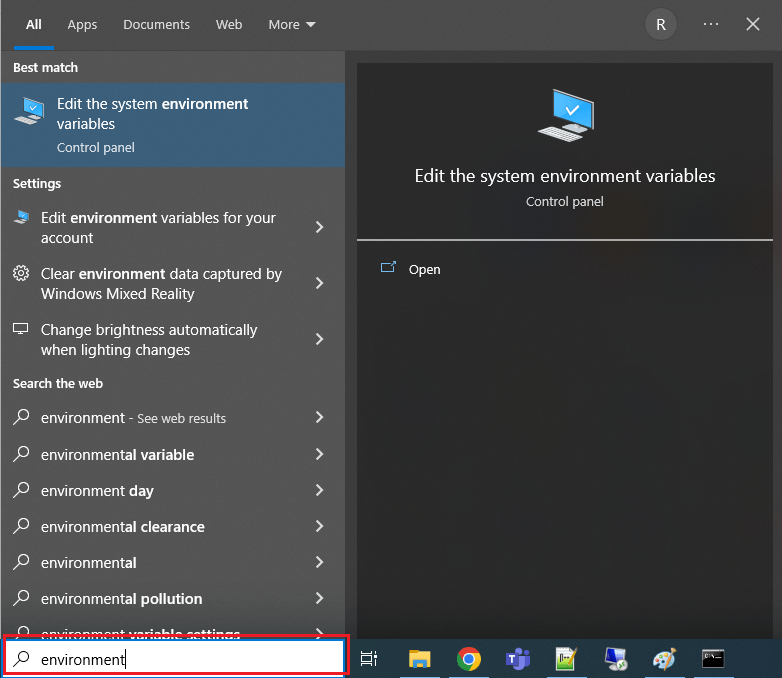
In this step, you have to set JAVA_HOME and Path in the System environment variables. To open the system environment variables dialog, you can type the ‘environment‘ in the Window search box and click on Edit the system environment variables as shown in the below image,
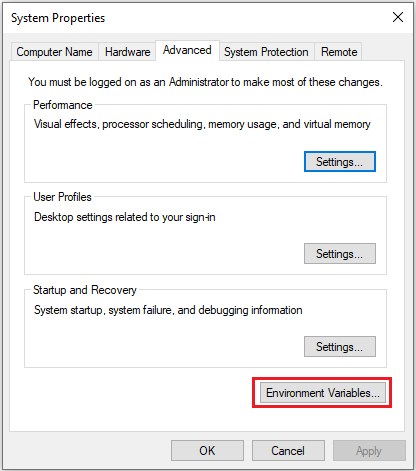
Now click on the Environment Variables button as follow, to open the Environment variable dialog.
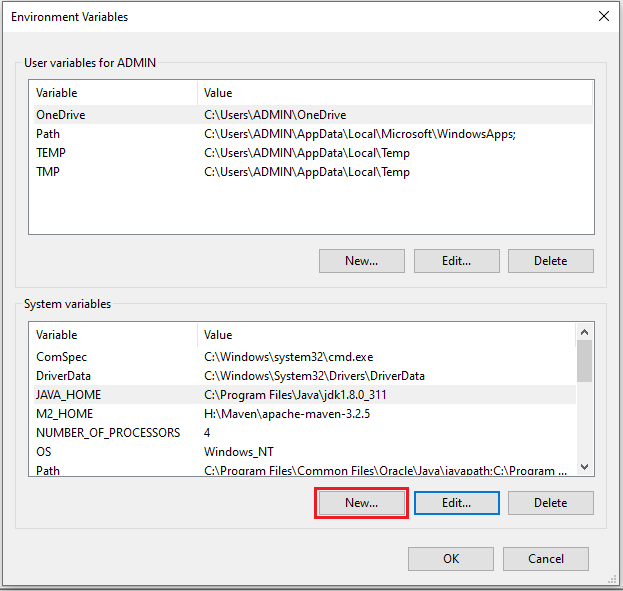
In the Environment Variables dialog, click on the New button to add the JAVA_HOME variable as follow:
In the below dialog fill the details like Variable name: JAVA_HOME and Variable value: C:\Program Files\Java\jdk-19

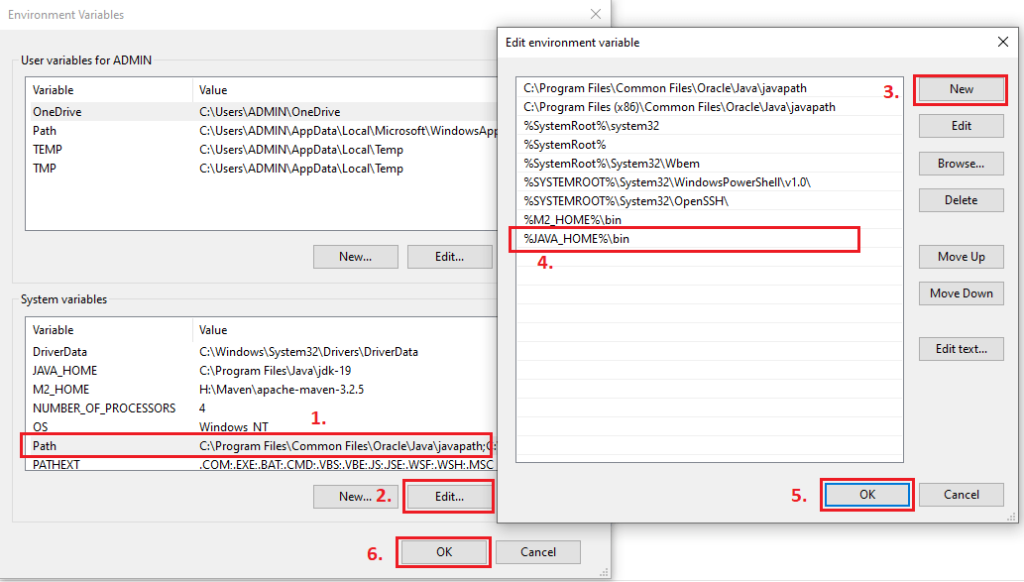
After that, you should update the Path variable as shown in the sequence number in the below image,
Step-4. Verify the installed Java Version
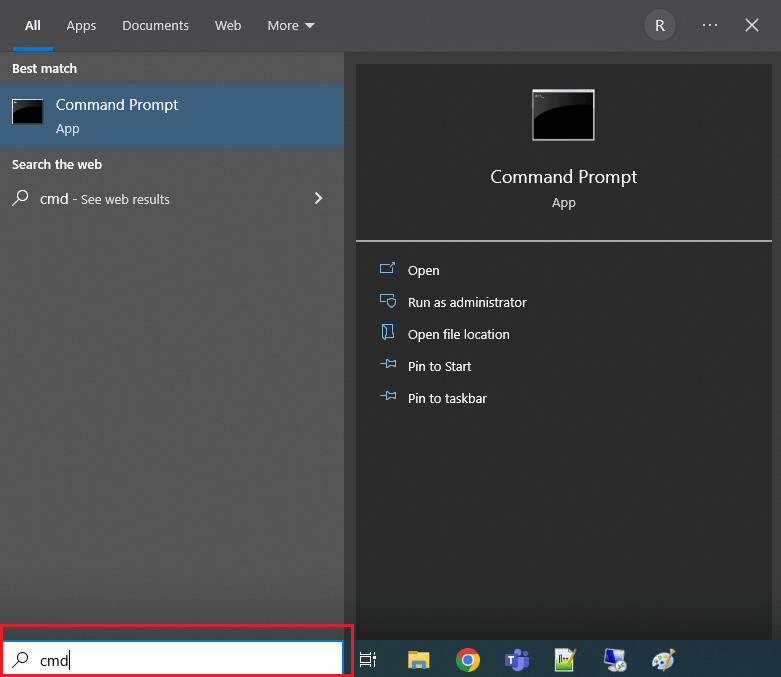
In this step, we will verify the installed Java JDK version. To confirm the installation, first of all, you can open a Command Prompt. To open it, you can type ‘cmd‘ in the Window’s search box and click on Command Prompt as shown in the below image.
Once the Command Prompt is opened, type java -version and press Enter key. Now you will see the Java JDK installed version as below image.
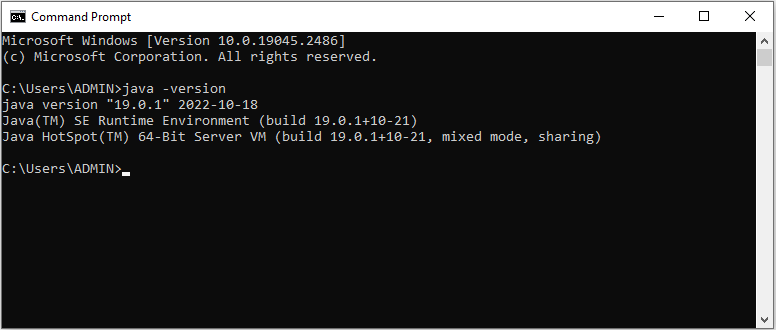
Congratulations! Now in your Windows System, JDK 19 has been installed successfully. Now create the first Java Program Hello World!
Conclusion
In this article, you have seen how Java JDK 19 downloads for Windows and installed it. Now you can be able to do the installation of other versions of JDK also with a similar set of steps that you have seen.
Start learning Top Java Logical Programs now.
Related articles:
- How to Download JDK 17 and Install on Windows 11 [64-bit]
- How to Download and Install JDK 11 on Windows 10?
- How to install Maven on Windows System
- How to install and configure Tomcat Server in Eclipse?
- Install MySQL Server 8.0.27 [zip Archive] on Windows 10
