This article explains how to set JAVA_HOME environment variable on the Windows Operating system. The JAVA_HOME is an environment variable that points to the JDK (Java Development Kit) installation directory.
Table of Contents
Prerequisite
- JDK (any version) should be Installed
- Window OS
Note: In this tutorial, we are taking the example of JDK 19 which is already installed on the Windows 10 Operating system.
Why do we need JAVA_HOME environment variable?
The JAVA_HOME environment variable is used by the Java compiler, debugger, and other tools to locate the JDK (Java Development Kit). In order to use the JDK, it is important to set the JAVA_HOME environment variable so that the tools can find it. This variable should be configured on all Operating Systems that have a Java installation, including Windows, Ubuntu, Linux, Mac, and Android.
How to set JAVA_HOME on Windows 10?
Follow the below steps properly, in order to set Java environment variables in your Windows machine. Here we will set JAVA_HOME and update the Path system variable.
1. Find Java Home Directory
First of all, you should find out where the JDK (Java Development Kit) is installed in your system. It is typically under the C:\Program Files\Java directory. As you can see in the below image, in our case it is installed at C:\Program Files\Java\jdk-19

2. Open System Environment Variables Dialog
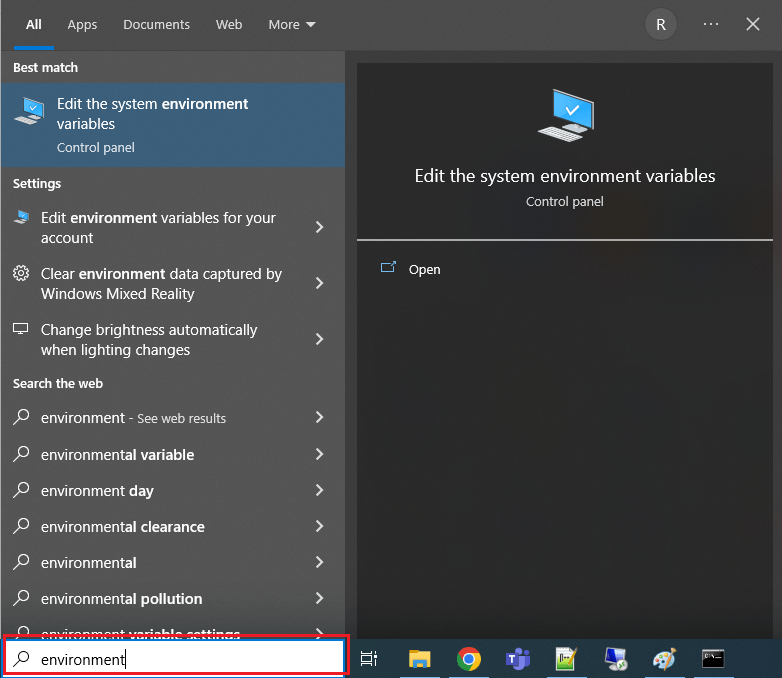
To open the system environment variables dialog, you can type the ‘environment‘ in the Window search box and click on Edit the system environment variables as shown in the below image,
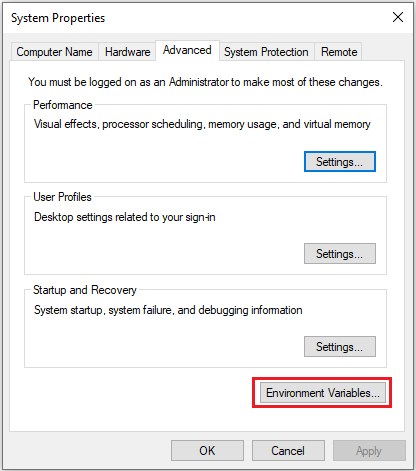
Now click on the Environment Variables button as follow, to open the Environment variable dialog.
3. Create JAVA_HOME Variable
In the Environment Variables dialog, click on the New button to add the JAVA_HOME variable as follow:
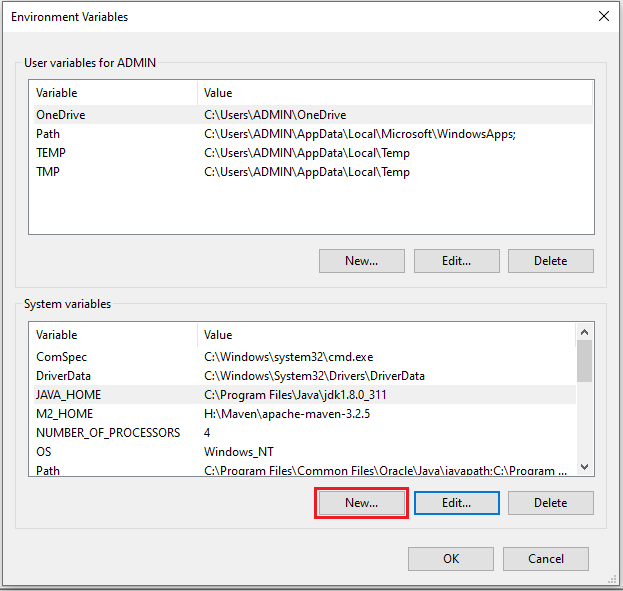
In the below dialog fill the details like Variable name: JAVA_HOME and Variable value: C:\Program Files\Java\jdk-19

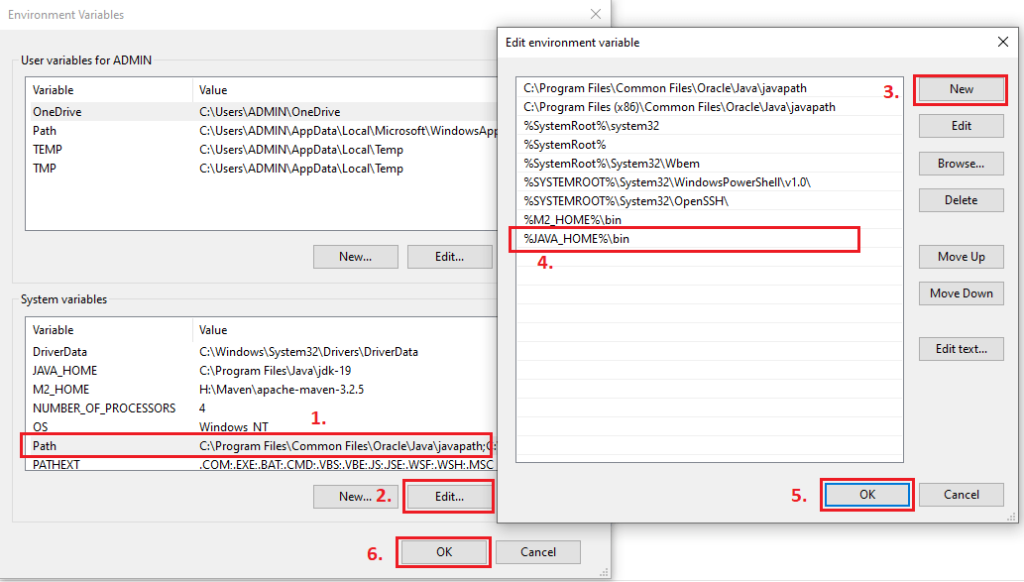
After that, you should update the Path variable as shown in the sequence number in the below image,
How to Verify the JAVA_HOME System Environment Variable?
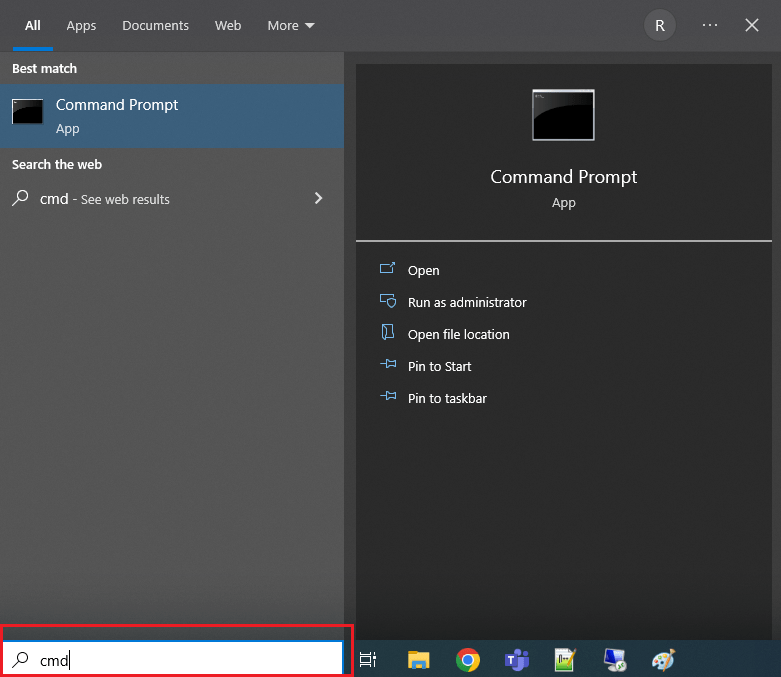
In order to verify the successful setup of the JAVA_HOME environment variable, you can open the Command Prompt by typing ‘cmd‘ in the Window search box as shown in the below image:
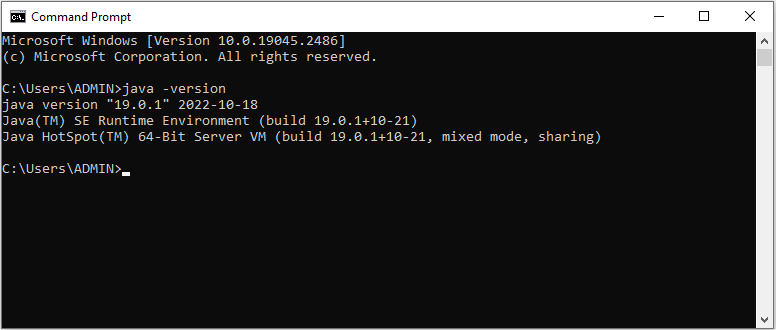
Once the Command Prompt is opened, type the command java -version and press Enter key. Now here you will see the java version getting displayed, it means you have successfully set up the JAVA_HOME environment variable on your Window machine.
Related articles:
- Download JDK 19 and Install on Windows 10 (64-bit)
- How to Download JDK 17 and Install on Windows 11 [64-bit]
- How to Download and Install JDK 11 on Windows 10?
- How to install Maven on Windows System
- How to install and configure Tomcat Server in Eclipse?
- Install MySQL Server 8.0.27 [zip Archive] on Windows 10
