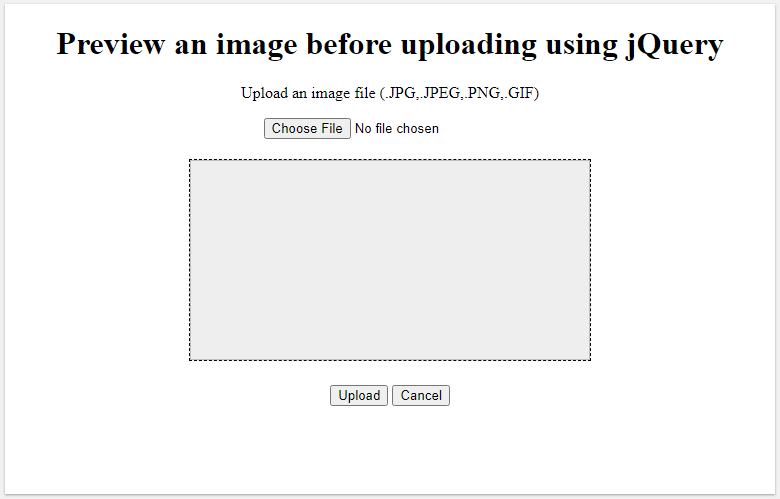
In this article, you will see how to preview or display an image before uploading it to the Server. Previewing the image is the best user experience. The users could be able to see which image they are going to upload.
Here we are going to use HTML, CSS, and jQuery to develop it. Let’s see how it can be done?
You just need to follow the below simple steps:
- Define the basic HTML
- Define the basic CSS for the HTML to apply the style
- Define the jQuery code to preview the image and reset
Table of Contents
Define the basic HTML
We need to define the basic HTML elements to choose an image file and preview/display it in some container.
<head>
    <!-- jQuery library script import -->
    <script src="https://ajax.googleapis.com/ajax/libs/jquery/3.5.1/jquery.min.js"></script>
</head>
<body>
    <h1>Preview an image before uploading using jQuery</h1>
    <p>Upload an image file (.JPG,.JPEG,.PNG,.GIF) </p>

    <!-- input element to choose a file for uploading -->
    <input type="file" accept="image/*" id="image-upload" />
    <br>
    <!-- img element to preview or display the uploading image -->
    <img id="image-container" />
    <br>
    <button id="upload-btn" >Upload</button>
    <button id="cancel-btn" >Cancel</button>
</body>
Let’s understand the above code with simple points:
- As we are using jQuery here, so we need to import jQuery libarary script.
- We are defining an HTML
<input>element to choose an image file. - We are defining an HTML
<img>element to display/preview the image. - Now we are defining two HTML
<button>elements to upload and cancel uploading.
Define the basic CSS
We are going to define some basic CSS for the above HTML element to apply the style. Let’s see the below CSS style which needs to be defined in <style> tag in HTML page:
/* to make everything center aligned */
body{
	text-align:center;
}

/* to set specific height and width for image preview */
#image-container{
	margin : 20px;
	height: 200px;
	width: 400px;
	background-color:#eee;
	border: 1px dashed #000;
}
Define the jQuery code to preview the image and reset
Now we need to define jQuery code to read the image file and to preview the image and reset if don’t need to upload it.
/* This function will call when page loaded successfully */
$(document).ready(function(){

	/* This function will call when onchange event fired */
	$("#image-upload").on("change",function(){

	  /* Current this object refer to input element */
	  var $input = $(this);
	  var reader = new FileReader();
	  reader.onload = function(){
			$("#image-container").attr("src", reader.result);
	  }
	  reader.readAsDataURL($input[0].files[0]);
	});


	/* This function will call when upload button clicked */
	$("#upload-btn").on("click",function(){
		/* file validation logic goes here if required */
		/* image uploading logic goes here */
		alert("Upload logic need to be write here...");

	});

	/* This function will call when cancel button clicked */
	$("#cancel-btn").on("click",function(){
		/* Reset input element */
		$('#image-upload').val("");

		/* Clear image preview container */
		$('#image-container').attr("src","");
	});

  });
Let’s understand the above code with simple points:
- The
$(document).ready(function(){...})function will be called when page has been loaded successfully. - The
$("#image-upload").on("change",function(){...})function will be called on the change event of HTML<input>element. Inside this,FileReaderclass object is created to read the uploading file. When the read operation is finished,onloadfunction will be triggered then FileReaderresultproperty returns the file’s contents. - The
$("#upload-btn").on("click",function(){...})function will be called on the click event of Upload button. Inside this, actual file upload code need to be write. - The
$("#cancel-btn").on("click",function(){...})function will be called on the click event of Cancel button. Inside this, reset image logic has been written.
Complete Example
Let’s put all the above code together in a single HTML page as follow:
preview_image.html
<!DOCTYPE html>
<html>
  <head>
    <title>Preview an image before uploading using jQuery</title>
    <!-- jQuery library script import -->
    <script src="https://ajax.googleapis.com/ajax/libs/jquery/3.5.1/jquery.min.js">
    </script>
    <style>
    /* To set everything center aligned */
	body{
		text-align:center;
	}

	/* To set specific height and width for image preview */
	#image-container{
		margin : 20px;
		height: 200px;
		width: 400px;
		background-color:#eee;
		border: 1px dashed #000;
	}
    </style>
  </head>
  <body>
    <h1>Preview an image before uploading using jQuery</h1>
    <p>Upload an image file (.JPG,.JPEG,.PNG,.GIF) </p>

    <!-- input element to choose a file for uploading -->
    <input type="file" accept="image/*" id="image-upload" />
    <br>
    <!-- img element to preview or display the uploading image -->
    <img id="image-container" />
    <br>
    <button id="upload-btn" >Upload</button>
    <button id="cancel-btn" >Cancel</button>

    <script>

	/* This function will call when page loaded successfully */
	$(document).ready(function(){

		/* This function will call when onchange event fired */
		$("#image-upload").on("change",function(){

          /* Current this object refer to input element */
          var $input = $(this);
          var reader = new FileReader();
          reader.onload = function(){
				$("#image-container").attr("src", reader.result);
          }
          reader.readAsDataURL($input[0].files[0]);
        });


        /* This function will call when upload button clicked */
		$("#upload-btn").on("click",function(){
			/* file validation logic goes here if required */
			/* image uploading logic goes here */
			alert("Upload logic need to be write here...");

		});

        /* This function will call when cancel button clicked */
		$("#cancel-btn").on("click",function(){
			/* Reset input element */
			$('#image-upload').val("");

			/* Clear image preview container */
			$('#image-container').attr("src","");
        });

      });
    </script>
  </body>
</html>
Preview and Live Demo

Conclusion
In this article, you have seen how to preview or display an image before uploading it to the server using jQuery, HTML, and CSS.
You can learn how to validate files before uploading them to the server using jQuery.
