Spring Tool Suite (STS) is an Eclipse-based development environment customized for Spring application development. It can be used as a separate standalone IDE or as a plug-in in Eclipse. This article will show how to install Spring Tool Suite (STS) as a plug-in in your existing Eclipse IDE.
Table of Contents
STS Software Dependency
- Spring Tool 3
- Eclipse IDE 2020-06 ( Download )
- Windows 10
How to install Spring Tool Suite?
To install STS in Eclipse there are a few simple steps to follow:
- Spring tool suite (STS) download
- Confirm STS features
- Review Licenses & Accept agreements
- Restart Eclipse IDE
- Verify STS installation
Step-1. Spring Tool Suite Download
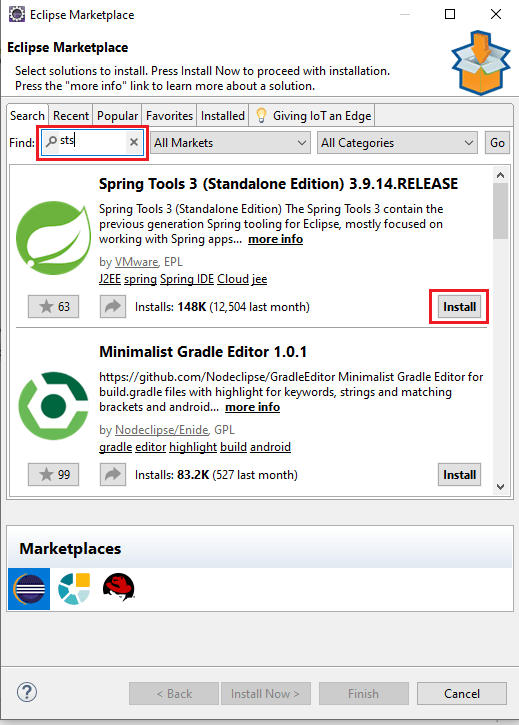
First of all, open your Eclipse IDE then click on Help menu > Eclipse marketplace… and just type “sts” in the search box then you will see the below image as a search result. The search result may vary if your system has a different version of Eclipse IDE.
Spring Tools 3 (Standalone Edition)
The Spring Tools 3 contains the previous generation Spring tooling for Eclipse, mostly focused on working with Spring apps configured using XML and providing validation support for various additional Spring projects, like Spring AOP, Spring Webflow, Spring Integration, etc.
Note: this cannot be installed in addition to the new Spring Tools 4. If you want to combine both generations, please use the Spring Tools 3 Add-On for Spring Tools 4 marketplace entry.
Now just click on the install button to start the installation process.
Step-2. Confirm STS Features
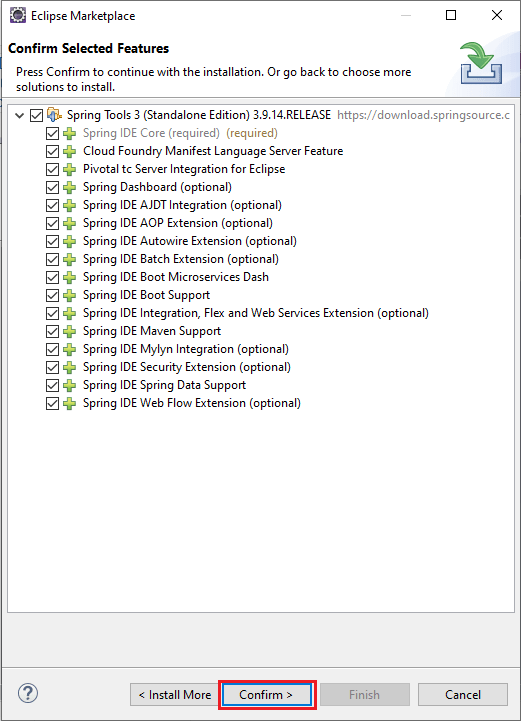
Once you click on install, you will be asked to choose and confirm the STS features by clicking on the Confirm button as below image.
Step-3. Review Licenses & Accept agreements
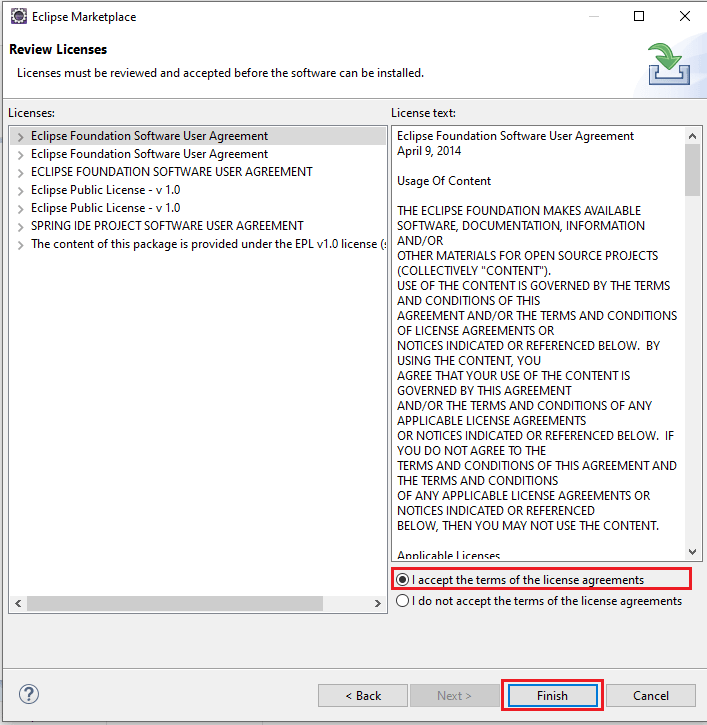
Now once you confirm the STS features, you have to accept the terms of the license agreements. As you can see in the below image.
Accept the license agreements and click on the Finish button.
As soon as you click on the Finish button it will start downloading and installing software as you can see below image. It takes a few minutes to install so wait for it.

Step-4. Restart Eclipse IDE
Once the installation has been completed it will ask you to restart the Eclipse IDE to affect the STS plug-in installation. Click on the Restart Now button below the image:

Step-5. Verify STS installation
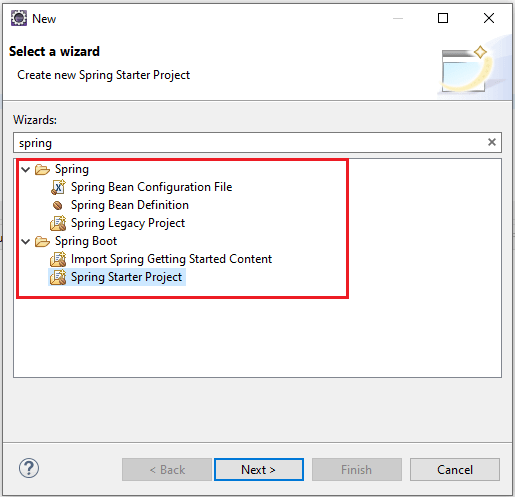
To verify it click on File > New > Others… and type spring, you can see the below images:
From here now you can able to create a spring boot application.
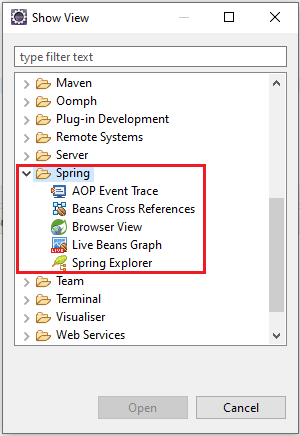
You can also check by clicking Window > Show View > Others… and see the below image:
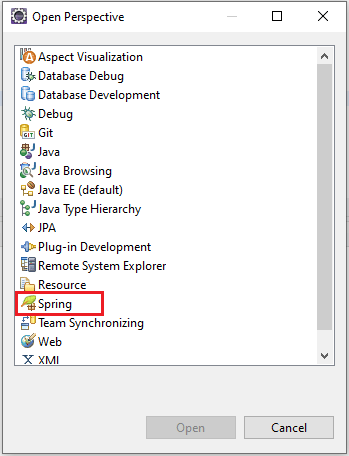
Also, you can find it in Prospective by clicking on Window > Perspective > Open Perspective > Others… you can able to see the below image:
Conclusion
In this article, you have installed Spring Tool Suite (STS) in your Eclipse IDE successfully. Now you can able to create any Spring boot application.
Hope you like it.
FAQ
How do you add dependency in Spring Tool Suite?
Right-click on the pom.xml of the generated project and choose Spring -> Add Starters from the context menu. It opens up the same dialog and lets you add additional dependencies.
