To Run any J2EE application(Servlet, JSP, etc.) in Eclipse, you need a Server. In this article, we will see how to download and configure Apache Tomcat Server in Eclipse IDE.
Table of Contents
Software Dependency
- Apache Tomcat-8.0.36
- Eclipse IDE 2020-06
- Windows 10
To install and configure Tomcat Server in Eclipse, we need to do the following steps:
1. Download Apache Tomcat
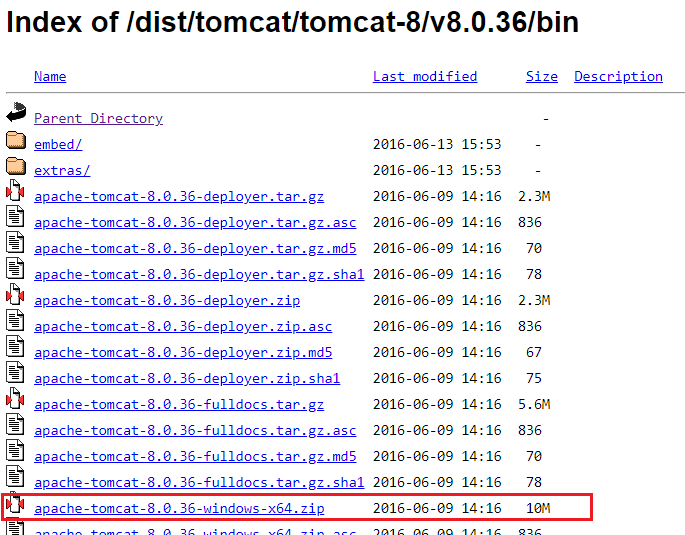
To download Apache Tomcat, visit Apache official website and download apache-tomcat-8.0.36-windows-x64.zip as below image:
2. Extract downloaded zip
Once you download the zip file, extract it in a folder of your system. Here we are extracting it at C:\Program Files\Apache Software Foundation\Tomcat-8.0.36 folder as you can see in below image:

3. Open Eclipse IDE
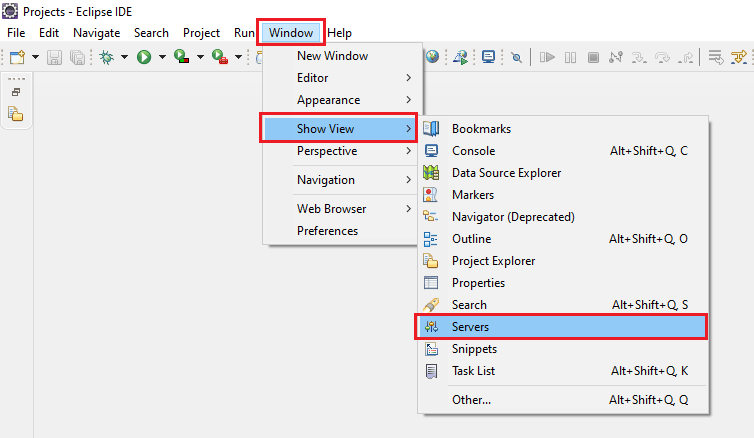
Now open your Eclipse IDE and click on Window menu > Show View > Servers as you can follow the below image:
4. Add New Server
Once you click on Servers, you can see the below image now click on the link to add a new server.

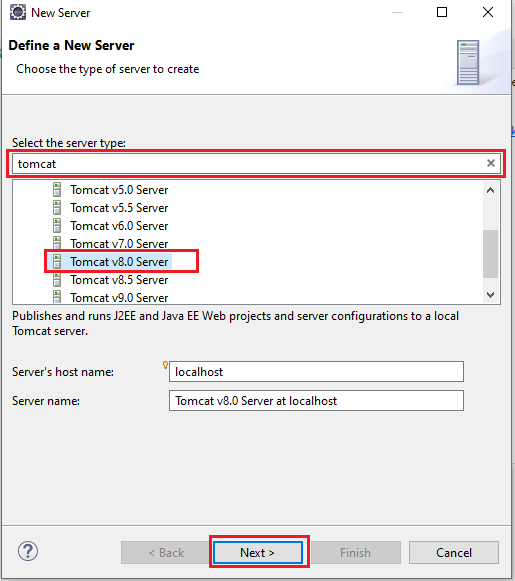
Now simply type tomcat and select Tomcat v8.0 Server and click Next as below image:
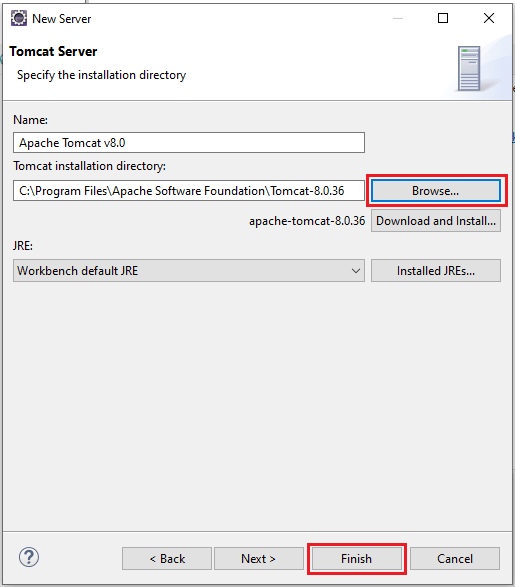
After that browse the extracted Tomcat-8.0.36 folder(C:\Program Files\Apache Software Foundation\Tomcat-8.0.36) and click on the Finish button as below image:
Now you can see Tomcat v8.0 Server successfully added to your eclipse IDE.

If you want to configure your custom port for your server you can configure it by simply double click on the added server.
5. Configure Port and Start Server
By default Server port is 8080, you can change it as below image:

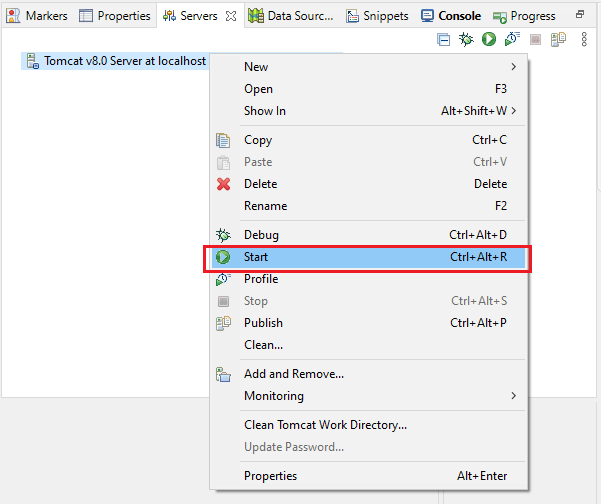
After that to run the server, Right-click on the added server and click Start as below image:
That’s it you have successfully configured the Tomcat server in Eclipse.
Hope you like it.
