This article shows you a detailed guide on how to install Eclipse IDE using a zip File. If you prefer installing Eclipse IDE for Java Developers on your Windows 11 (64-bit) system using a zip file, the process is straightforward and offers flexibility.
Eclipse Foundation recently introduced the Eclipse Installer, a new and more efficient way to install Eclipse. It is a proper installer (no zip files), with a self-extracting download that leads you through the installation process. See the full Guide here.
Table of Contents
Why Eclipse IDE?
Eclipse IDE offers various set of features specifically for Java development, including:
- Rich set of plugins: Eclipse supports various plugins and extensions, allowing developers to customize their development environment according to their needs.
- Code assistance and debugging: With features like code completion, syntax highlighting, and integrated debugging tools, Eclipse enhances productivity and simplifies the development process.
- Integrated development environment: Eclipse provides a unified platform for coding, testing, and debugging Java applications, making it an efficient tool for developers.
Eclipse IDE zip Download for Windows
Steps to download Eclipse IDE for Java Developers for Windows:
1. Visit the Eclipse IDE website: Open your web browser and navigate to the Eclipse website download page https://www.eclipse.org/downloads/packages/
2. Choose Eclipse IDE for Java Developers: From the list of available packages, select “Eclipse IDE for Java Developers“. Ensure you download the version compatible with Windows 11 (64-bit) as you can see in the below image:

3. Select the download mirror: On the download page, choose a download mirror closest to your location to initiate the download process. Selecting a mirror helps optimize download speed.

4. Download the zip file: Click on the download link associated with the zip file version of Eclipse IDE for Java Developers. The download should begin shortly.
Installing Eclipse IDE from the Zip File
Once you have downloaded the Eclipse IDE zip file, follow these steps to install it.
Steps to install Eclipse IDE from the zip file:
1. Extract the zip file: Navigate to the directory where the zip file was downloaded. Right-click on the zip file and select “Extract All…” to extract its contents. Choose a destination folder where you want to extract the files and click “Extract”.

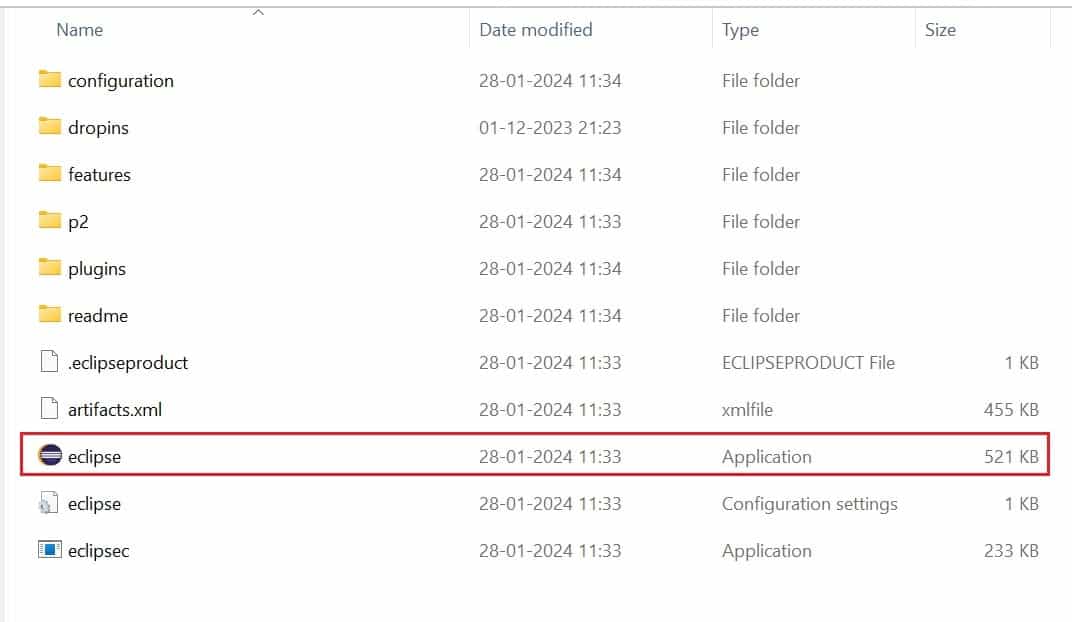
2. Navigate to the extracted folder: After the extraction process is complete, open the folder where the contents of the zip file were extracted. You should see a folder named something like “eclipse”.
3. Launch Eclipse IDE: Open the “eclipse” folder and double-click on the “eclipse.exe” file to launch Eclipse IDE.

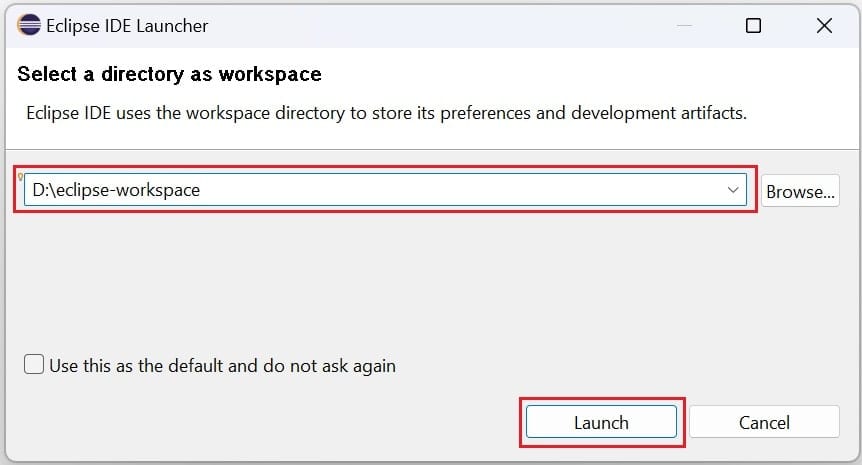
4. Specify workspace location: Upon launching Eclipse, you will be prompted to specify a workspace directory where your projects and files will be stored. You can choose the default workspace location or specify a custom location according to your preference.

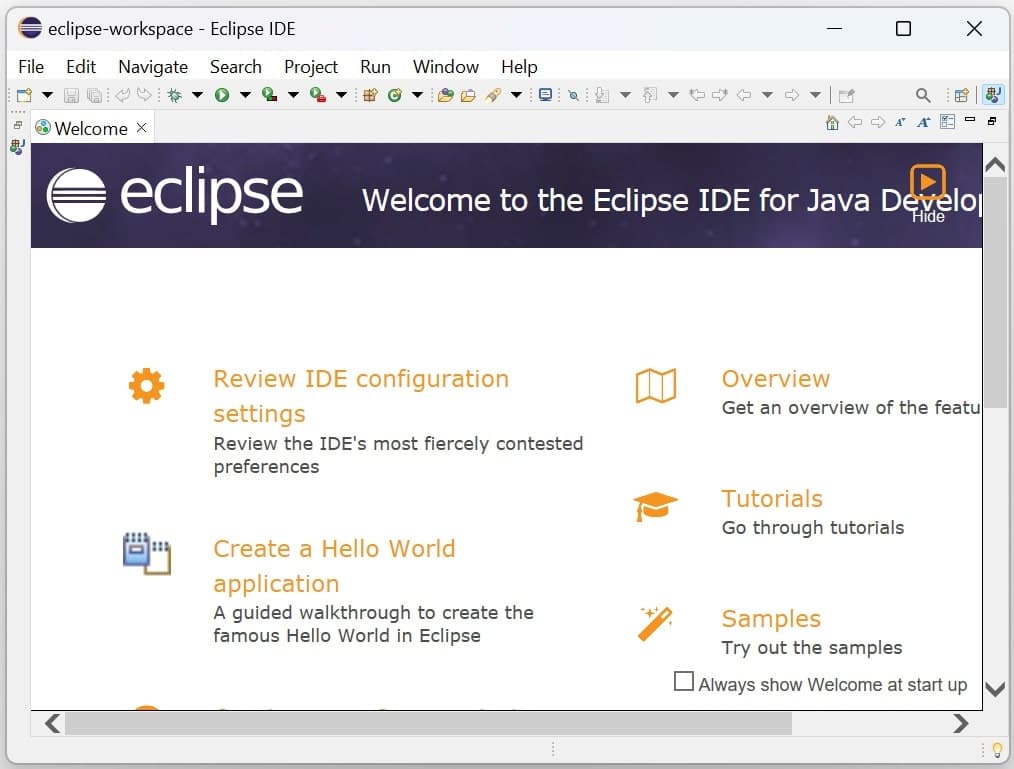
5. Start using Eclipse: Once you’ve selected the workspace location, Eclipse IDE will load and you’ll be ready to start coding in Java.

Configuring Eclipse IDE
After installation, you may want to configure Eclipse IDE according to your preferences:
- Install additional plugins: Eclipse supports various plugins and extensions to enhance its functionality. You can install additional plugins through the Eclipse Marketplace or by manually adding them to your Eclipse installation.
- Configure settings: Explore Eclipse’s preferences to customize settings related to code formatting, syntax highlighting, and other aspects of the IDE.
- Update Eclipse: Periodically check for updates to Eclipse IDE to ensure you have the latest features and bug fixes. You can check for updates through the “Help” menu in Eclipse.
Conclusion
Install Eclipse IDE using a zip file for Java Developers on Windows 11 (64-bit) offers simplicity and flexibility. By following this guide, you’ve learned how to download the zip file, extract its contents, and launch Eclipse IDE on your system. Now, you’re ready to dive into Java development using Eclipse’s powerful tools and features. Happy coding!
