This article shows you how to Download and install Eclipse IDE for Java EE Developers for Windows 11 64-bit. Eclipse IDE stands out as one of the most popular integrated development environments (IDEs) for Java developers. Its robust features, extensibility, and community support make it a preferred choice for software development. If you’re a Java developer diving into Windows 11, here’s a comprehensive guide to downloading and installing Eclipse IDE on your system.
Table of Contents
Why Eclipse IDE for Java Development?
Eclipse IDE offers various set of features specifically for Java development, including:
- Open Source: Eclipse is freely available and fosters collaboration.
- Rich Plugin Ecosystem: Offers a wide array of plugins for customization.
- Cross-Platform Compatibility: Runs seamlessly on Windows, macOS, and Linux.
- Robust Java Tools: Provides comprehensive support for Java development.
- Community Support: Active community and resources for assistance.
- Continuous Innovation: Regular updates introduce new features and enhancements.
How to Download Eclipse IDE for Windows 11 64-bit?
Steps to Download Eclipse IDE for Windows:
To get started with Eclipse IDE for Java development on your Windows 11 (64-bit) system, follow these steps:
1. Visit the Eclipse IDE website: Open your preferred web browser and navigate to the official Eclipse website at https://www.eclipse.org/.
2. Navigate to Downloads: Once on the Eclipse website, locate the “Downloads” on the homepage. Click on it to proceed to the downloads page. Or navigate to the installer page here: Eclipse installer page.
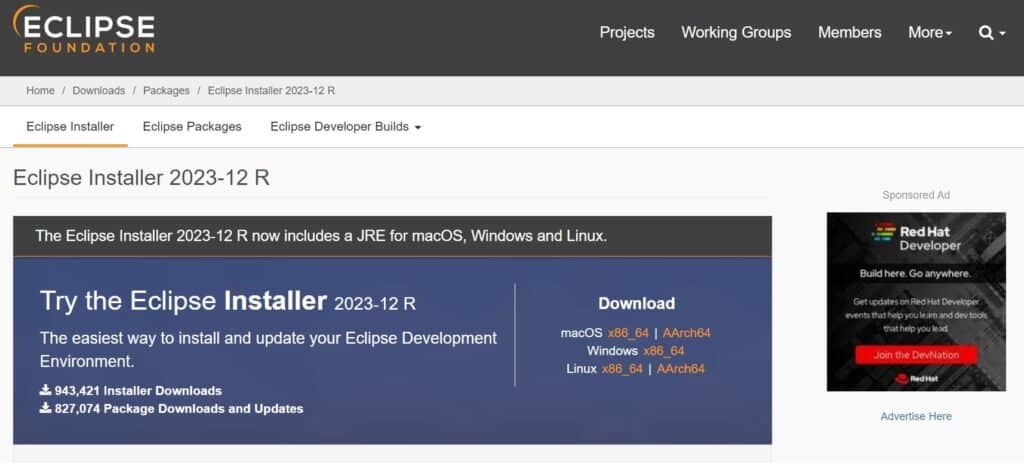
3. Select your operating system: Since you’re using Windows 11 (64-bit), choose the appropriate version for your system architecture. Once you click on the link it opens the below page for download.
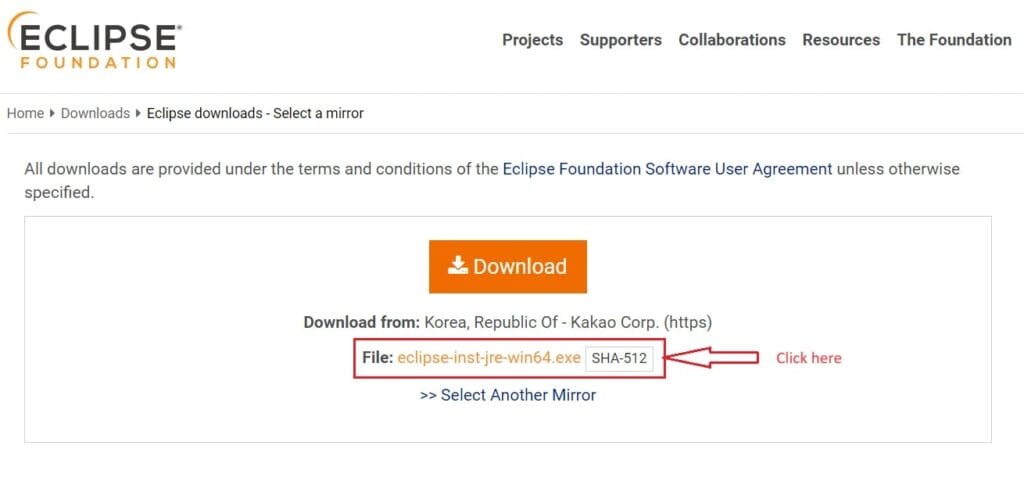
4. Download the installer: Once you’ve selected the correct version, click on the download link to initiate the download process. The download may take a few moments to complete depending on your internet connection speed.
How to Install Eclipse IDE for Java EE Developers?
After downloading the Eclipse IDE installer, you’re ready to proceed with the installation process:
Steps to install Eclipse IDE for Windows 11 64-bit:
1. Locate the downloaded installer: Once the download is complete, navigate to the directory where the installer file was saved. For Windows users, after the Eclipse Installer executable has finished downloading it should be available in your download directory.

2. Run the installer: Double-click on the installer file to launch the Eclipse IDE installation wizard. You may be prompted by the User Account Control (UAC) to confirm the installation process. Click “Yes” to proceed.
3. Select installation options: The installation wizard will guide you through the installation process. You may be prompted to choose the installation directory and select additional components or plugins to install. For most users, the default options are sufficient. Click “Install” to proceed.
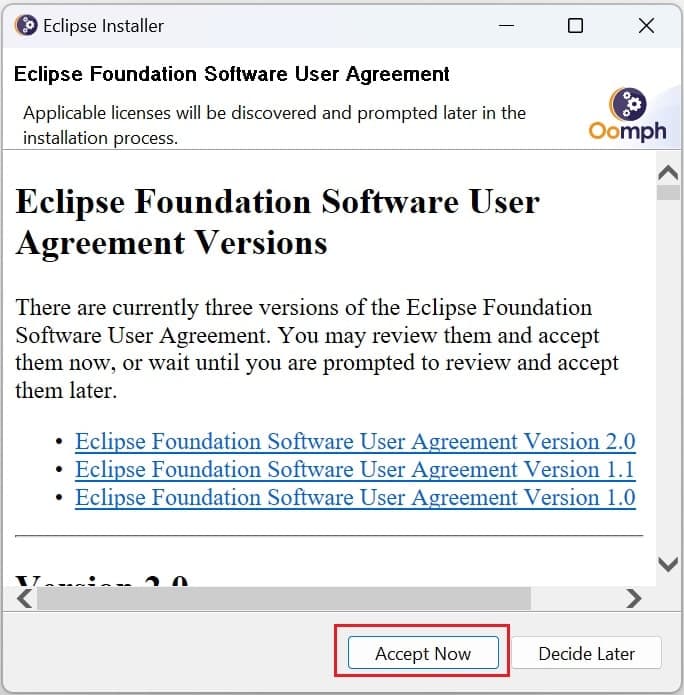
4. Review and accept the license agreement: Before proceeding with the installation, you’ll be presented with the Eclipse Foundation Software User Agreement. Read through the terms of the agreement and if you agree, select the button to accept the terms and click “Accept Now”.
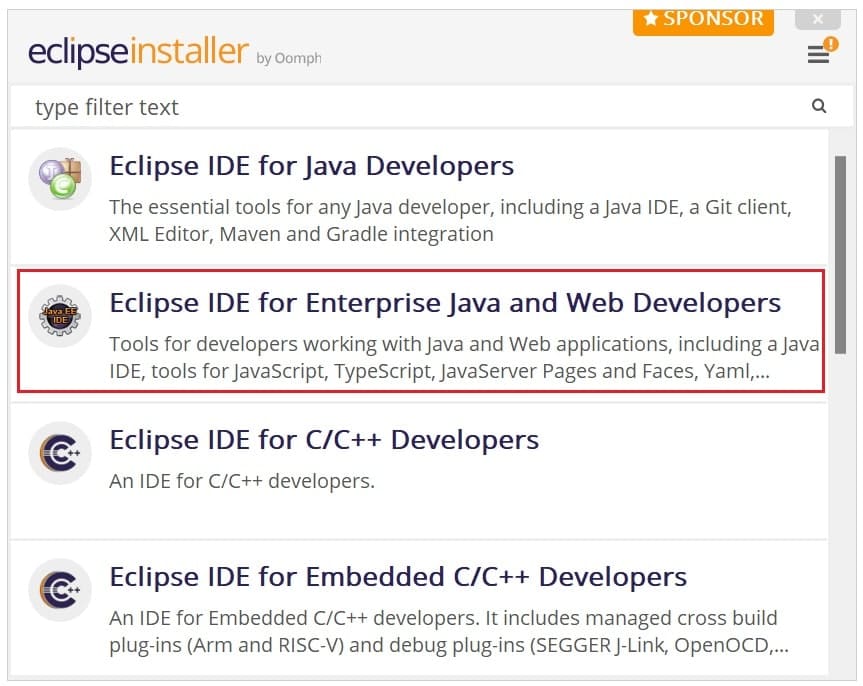
5. Complete the installation: Once you’ve clicked on “Accept Now” to initiate the installation process. Before starting installation it will ask you to change your installation folder. here you can go with the default selection also. Now click on the “INSTALL” button to start the installation process as shown in the below image.
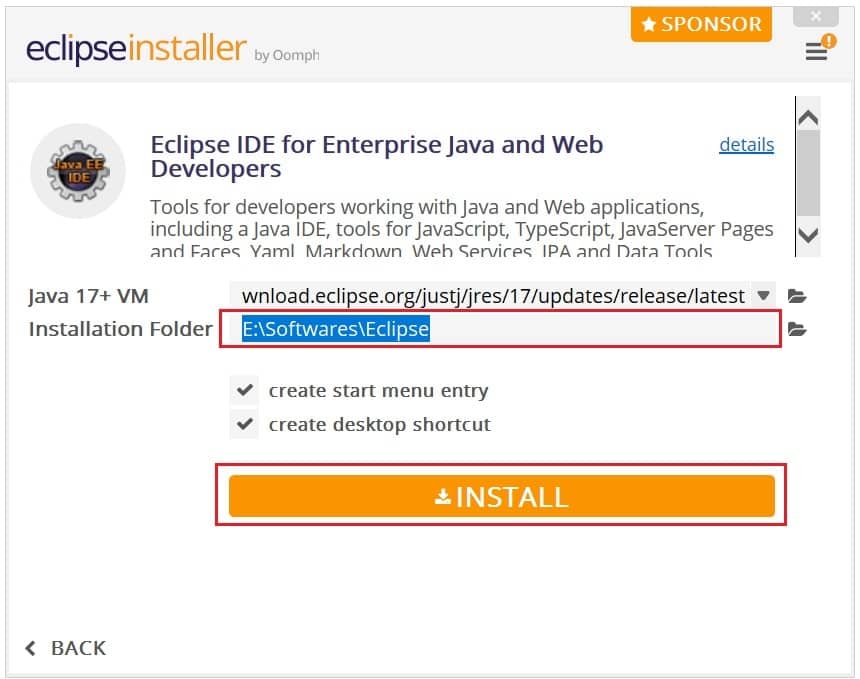
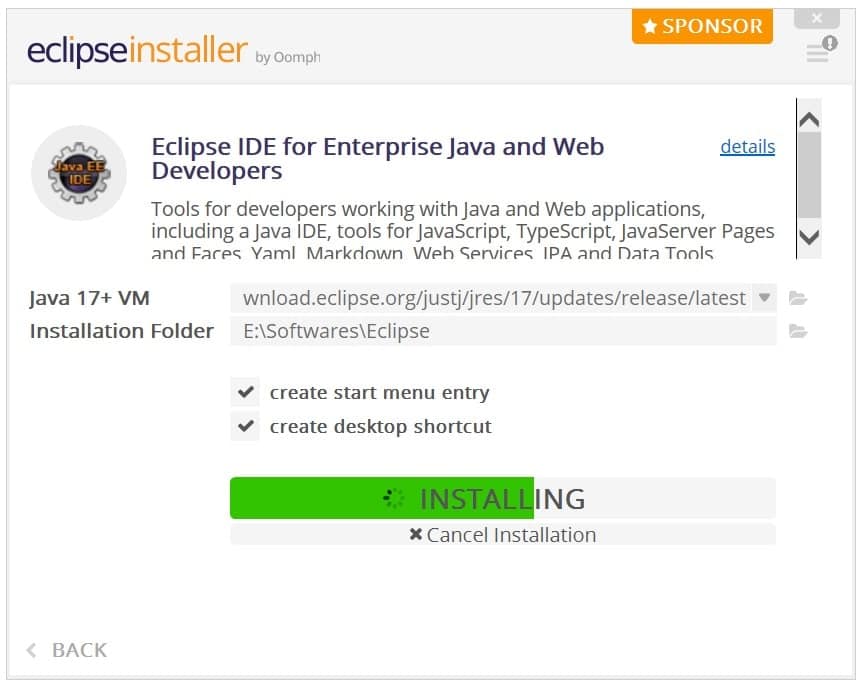
The installer will now proceed to install Eclipse IDE on your system. Depending on your system’s performance, the installation process may take a few minutes to complete.
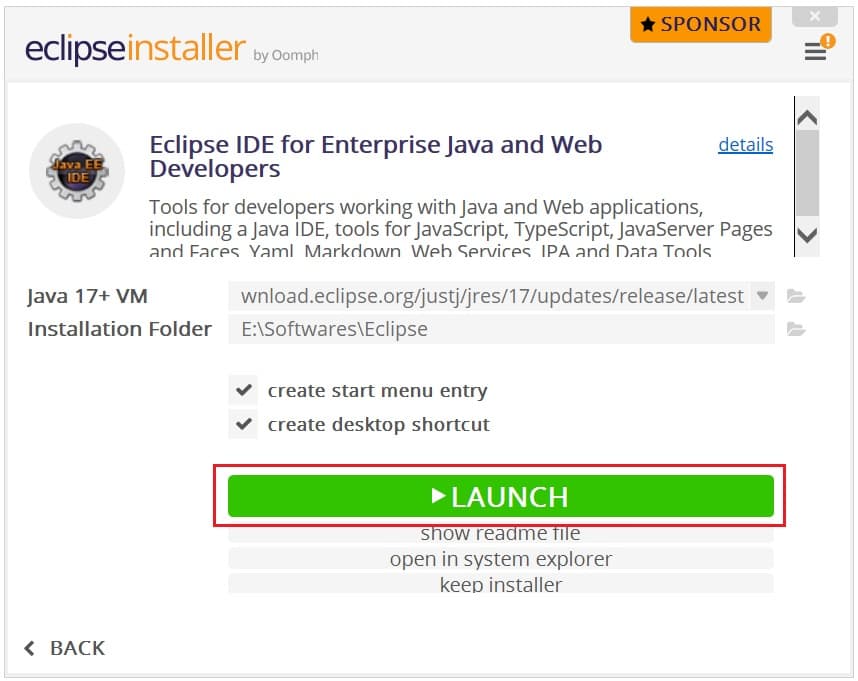
6. Launch Eclipse IDE: Once the installation is complete, you can launch Eclipse IDE by locating it in the Start menu or desktop shortcut—Double-click on the Eclipse icon to launch the IDE.
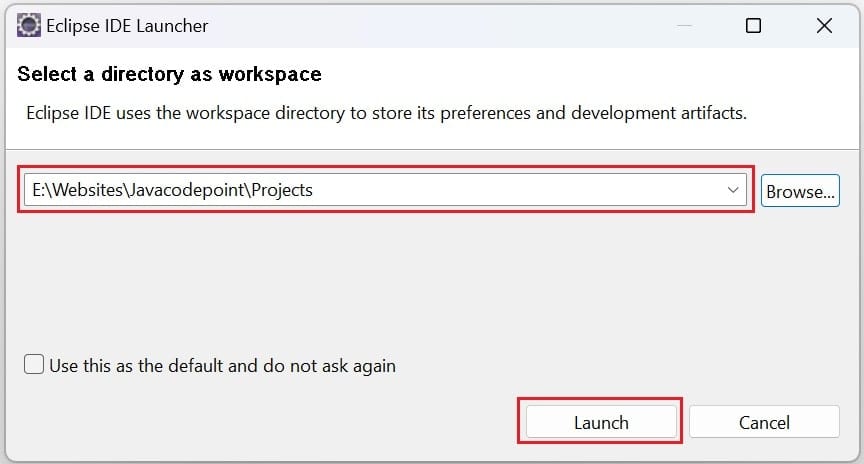
7. Configure workspace: Upon launching Eclipse IDE for the first time, you’ll be prompted to specify a workspace directory where your projects and files will be stored. You can choose the default workspace location or specify a custom location according to your preference.
Congratulations! You’ve successfully downloaded and installed Eclipse IDE for Java EE Developers on your Windows 11 (64-bit) system. You’re now ready to start on your Java development journey using Eclipse’s powerful tools and features.
Conclusion
Eclipse IDE remains a cornerstone in the Java development landscape, offering a robust set of features and tools to streamline the development process. By following this guide, you’ve learned how to download and install Eclipse IDE for Java EE Developers on your Windows 11 (64-bit) system. With Eclipse IDE at your disposal, you can dive into Java development with confidence and efficiency.
Related articles:
- Eclipse IDE for Java Developers Download and Install on Windows 11
- Install Eclipse IDE using a Zip file on Windows 11 (64-bit)
- How to Download and Install JDK 11 on Windows 10?
- How to install Maven on Windows System
- How to install and configure Tomcat Server in Eclipse?
- Install MySQL Server 8.0.27 [zip Archive] on Windows 10
