In this article, you will learn how to Download and Install JDK 23 on Windows 11 64-bit operating system. Java Development Kit (JDK) is essential for Java developers and programmers to create Java applications and programs. JDK includes tools and libraries necessary for developing Java applications.
Other Java Downloads for Windows 10
Java 8, Java 11, Java 17, Java 19, Java 20, Java 21
Other Java Downloads for Windows 11
Java 8, Java 11, Java 17, Java 19, Java 20, Java 21, Java 23
Table of Contents
How to Download JDK 23 for Windows 11 64-bit?
Steps to download Java JDK 23 for Windows 11:
Step 1: Open your web browser and navigate to the official Oracle website.
Step 2: Go to the Java SE Development Kit 23 Downloads page.
Step 3: Select the appropriate JDK download link for Windows 64-bit. Ensure that you choose the correct version for your operating system as shown in the below image.
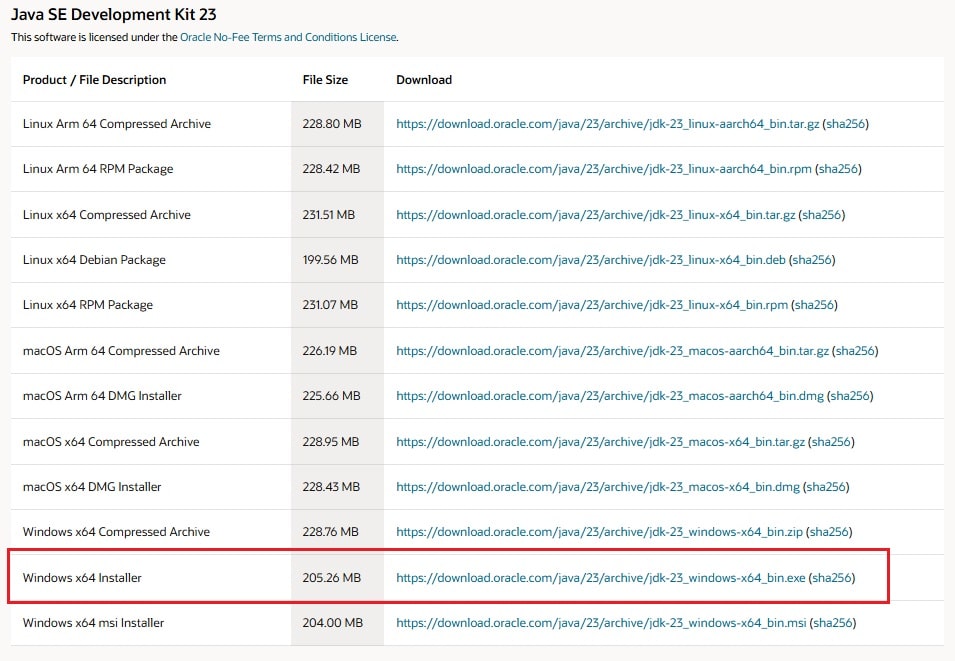
Step 4: You may be required to accept the license agreement. If so, click the checkbox next to “Oracle Technology Network License Agreement for Oracle Java SE.”
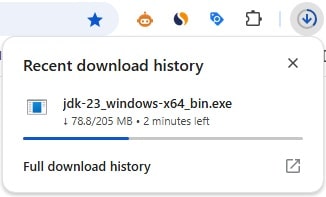
Step 5: Finally, click on the download link to initiate the download process.
How to Install JDK 23 on Windows 11 64-bit?
Once the JDK 23 installer is downloaded, follow these steps to install it on your Windows 11 64-bit system:
Steps to install JDK 23 on Windows 11:
Step 1: Locate the downloaded JDK installer file (jdk-23_windows-x64_bin.exe) in your Downloads folder or the location where you saved the file.

Step 2: Double-click on the installer file to start the installation process. You will be asked for permission, simply click on yes here to continue.
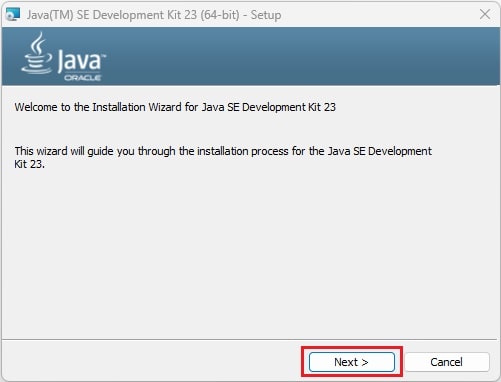
Step 3: The installer will prompt you with the JDK Setup wizard. Click “Next” to proceed.
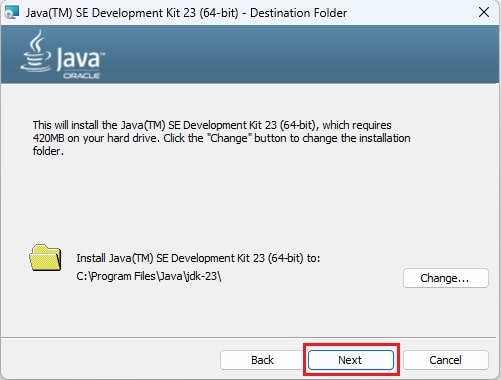
Step 4: Choose the installation location for JDK 23. By default, it is installed in the “C:\Program Files\Java\jdk-23” directory. You can change the installation directory if necessary. Click “Next” to continue with the installation process.
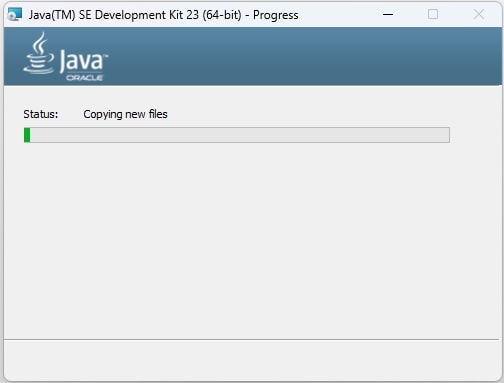
Step 5: The installer will start installing JDK 23 on your Windows 11 64-bit system. This process may take a few minutes depending on your system’s performance.
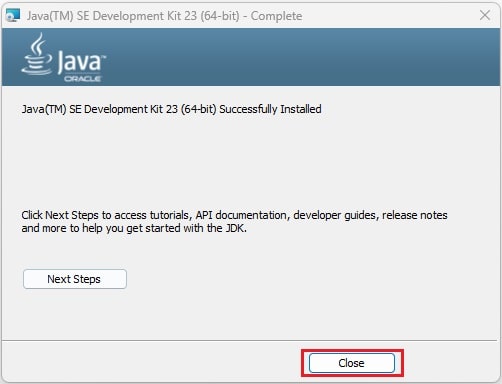
Step 6: Once the installation is complete, you will see a confirmation message indicating that JDK 23 has been successfully installed on your system. Click “Close” to exit the installer.
Environment Variables Setup for Java
After installing JDK 23, you need to set the JAVA_HOME environment variable to point to the JDK installation directory. Here’s how to do it:
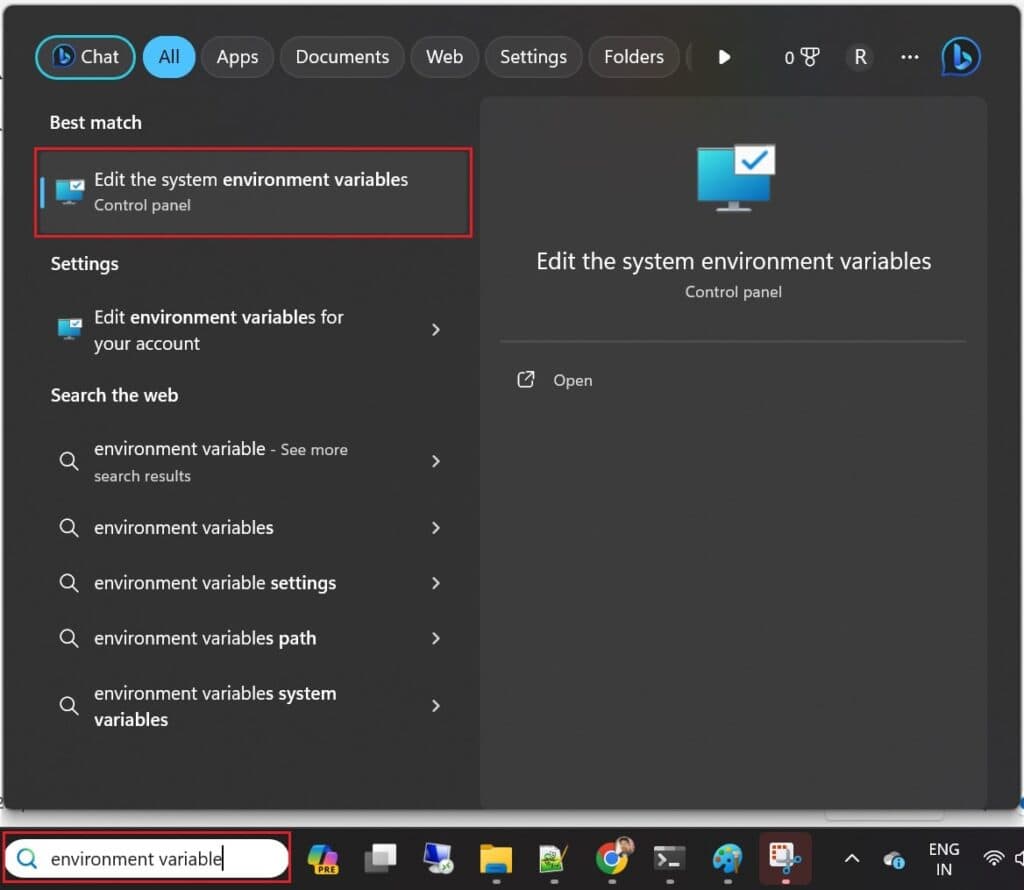
Step 1: Open the System Properties Window by searching “environment variable” in the Windows search box as shown in the below image:
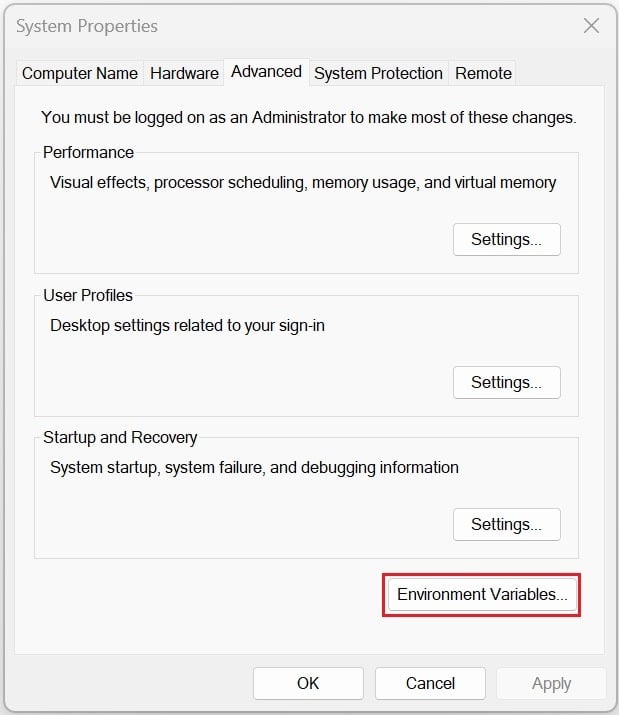
Step 2: In the System Properties window, click on the “Environment Variables” button to open the Environment Variables window.
Step 3: In the Environment Variables window, under the “System variables” section, click on “New” to add a new environment variable. Enter “JAVA_HOME” in the “Variable name” field. In the “Variable value” field, enter the path to the JDK installation directory. For example, C:\Program Files\Java\jdk-23.
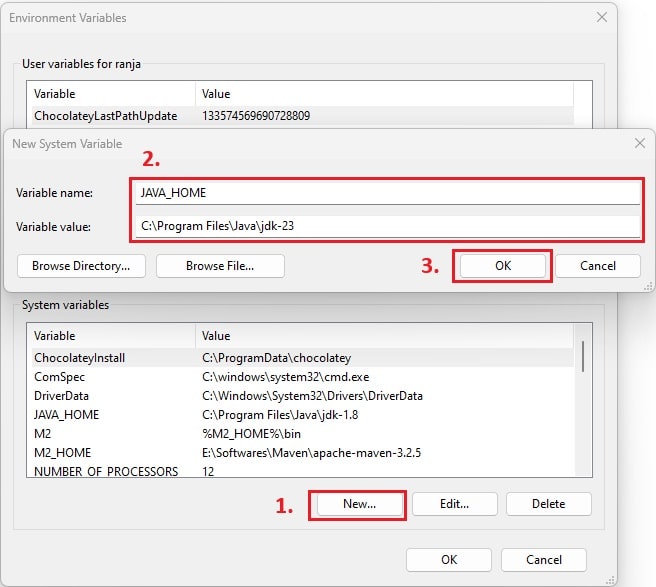
Step 4: Now edit the “Path” variable to add the Java bin path as shown in the below image:
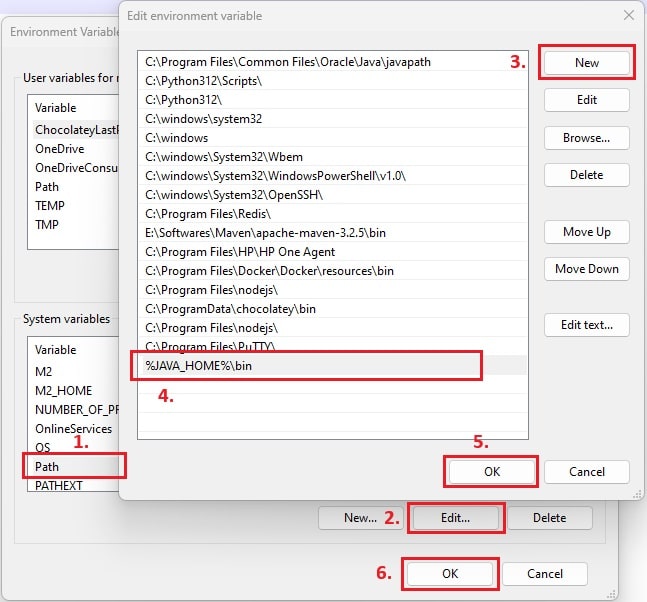
Step 5: Click “OK” to save the changes and close the Environment Variables window.
Verify JDK Installation
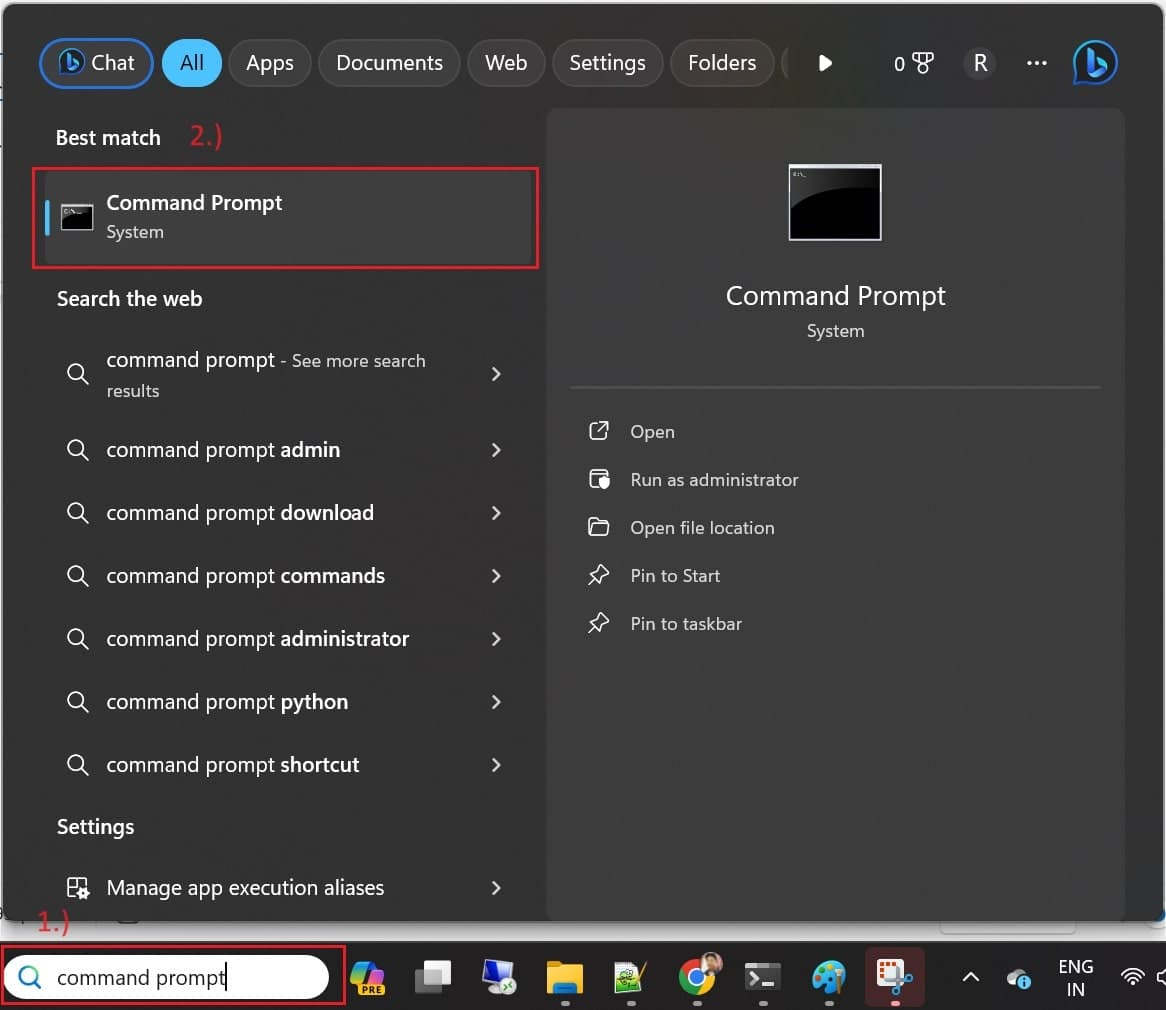
To verify that JDK 23 is installed correctly on your Windows 11 64-bit system, open Command Prompt by searching “command prompt” in the Windows search box as shown in the below image:
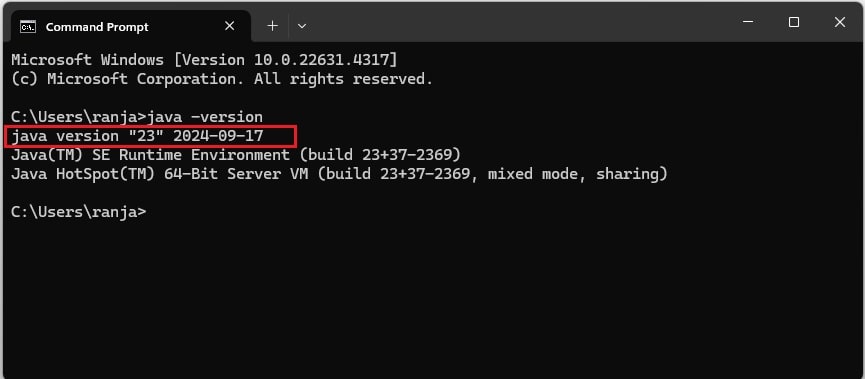
Once the command prompt window opens, type the command “java -version” and press enter key. If JDK 23 is installed properly, you should see information about the installed Java version as shown in the below image:
Conclusion
In conclusion, here you have seen how to download and install JDK 23 on a Windows 11 64-bit system process that empowers developers to leverage the latest Java development tools and libraries for creating robust applications. By following the steps outlined in this guide, users can seamlessly download, install, and configure JDK 23, enabling them to embark on their Java development journey with confidence.
Start creating the first Java program Hello World! Java Hello World program. You can start practicing more Java logical programs here.
Related articles:
- Free Download & Install JDK 20 on Windows 11
- How do you download and install JDK 11 on Windows 10?
- How to install Maven on Windows System
- How do you install and configure Tomcat Server in Eclipse?
- Install MySQL Server 8.0.27 [zip Archive] on Windows 10
